6th September 2018 1:42 am
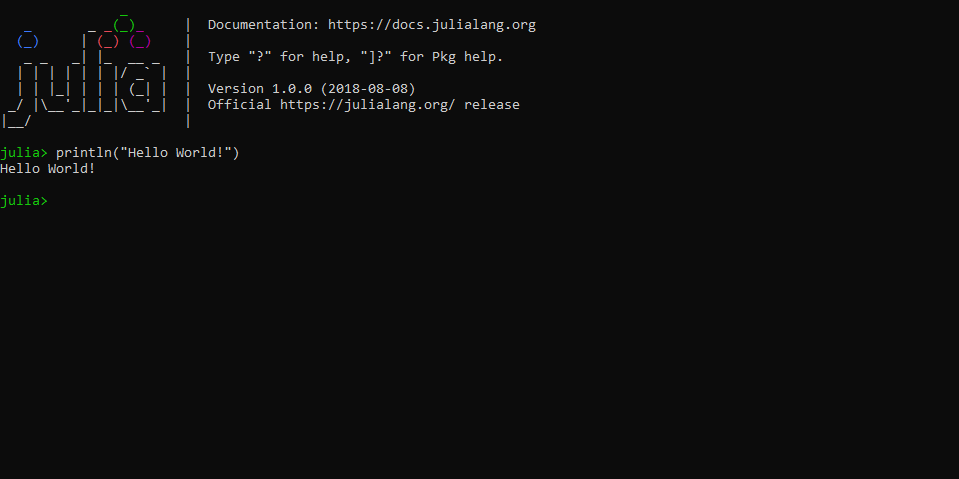
It’s been a while. Between work and just working on different things I’ve been studying this little coding language I found out about in this news post called Julia. It’s apparently made to combine the best features of various programming languages like C, Python, Ruby and many others.
I’ve downloaded it and have since been poking at the VERY extensive documentation for the language. This post will be going over what I’ve noticed so far, specifically what I’ve liked.

The first thing to get out of the way is that, like Python, Julia is dynamically typed. This is always nice for beginners but is sometimes a pain for veteran programmers. And while it’s a pretty petty gripe in this age of modern hi-powered computers at under 300$, the number 44 hardly needs to be an Int64 when it really only needs to be an Int8, but Int64 is the default on my x86 machine.

There’s a feature for specifying type but it only works in the local scope of functions. Functions themselves can also be typed, so they can be forced to return an Int8 or something. The only definitive workaround is to specify the number in binary or hex, in which case Julia will give it the absolute minimum type it needs. Again, with computer hardware having memory measured in gigabytes this isn’t exactly a huge issue. The only problem would be with integer division, though Julia seems to default to float values when doing division.
The more I look into Julia the more I like what I see. There’s a lot of quality of life features, just those little syntax touches you always desperately wanted to be in other languages but they never were. Take the power function: In python, raising one number to the power of another number is done using a built-in function:

That’s slightly awkward. Typically when typed out, x to the power of y is just x^y. It’s so simple and you want to type that and for it to work but it absolutely won’t. Julia, on the other hand, actually addresses this tiny detail:

Much easier. It’s such a small thing, but it’s these small things that make a difference towards readability. It’s all about making important operations simple, making this not only easy to learn but also just more compact to use.
For another example, take array operations. Arrays have always been a big deal but they’re even more important now with Neural networks and data mining. Being able to more easily code array operations AND read array operation code is a pretty big deal:

Finally, this is another really minor thing but I love this so much: Like C, strings in Julia are treated as an array of characters. However, unlike C, creating strings isn’t such a huge issue. You can make your string like it’s python, then reference characters like it’s a string array in C. Literally the best of both worlds. I imagine this can be a powerful tool for easier argument parsing.

The last thing I want to note before I go into the test program I had made is the functions in Julia. Typically, when a function is called with parameters then the function essentially creates its own copies of those parameters to use in its scope. The only programming language I can really recall having a way to alter the caller’s variables is in C, using pass-by-reference, ie function(&x, &y). Even then, that’s just the function making a copy of the memory address it can edit directly. Julia is different in that it uses pointers by default, meaning that if you don’t want the caller’s variables changed you have to make explicit copies in the function itself.
To me, this is more intuitive to first-time programmers. After all, it makes more sense that variables passed to a function should be the same variables used within that function. Making explicit copies, in my opinion, enhances readability if it’s sometimes easy to forget functions have their own copies that they use.
With that, I had decided to remake my old Knuth arrow code in Julia. Nothing like programming challenges to break into a new language.:

Comparing to the python code it barely looks any different, so it’s very python-like. Still, the power function is much more straightforward, and the end of every if statement is more clearly defined.
Checking the output in powershell, it’s exactly the same as the python program:

I’m really excited to start playing around with Julia, seeing what else I can do with it. If I have any updates as to projects I start in Julia, I’ll be sure to post about it here. As for the future of Julia…I say it’s looking bright. It’s definitely prioritized readability and usability. It’s even compatible with C code, so it’s looking to be a useful tool, especially in our data-science focused world. Julia just hit v1.0 and I’ll be excited to see what features future updates bring. It might not be 100% ready for widespread use, but I think it makes a pretty good learner’s program even at first glance and it has pretty clear priorities. He’s to seeing what it does!
~Nicko
28th August 2018 4:01 am

I’ve owned a Yobo NES Clone system since I was 16, it’s how I’ve played all my NES games I’ve collected over the years. One of my favorite games to play, unsurprisingly, is The Legend of Zelda. Even today it’s a mellow adventure in a quaint pixel world I can return to. Sadly, my gold cart LoZ game started to become harder to get to run, and eventually it wouldn’t run at all. No matter how much I adjusted the cart, it wouldn’t switch on.
Thus, I bought this second LoZ Cart. The grey colored re-release, since I figured I may as well have that version. The store that sold me the grey cart tested it in front of me and confirmed it to be a perfectly working cart. So I get home only to find the grey cart has the same error as my gold cart. Flick it on and my T.V reports no signal about 1 second later. My suspicions roused, I wondered if this was a problem with my NES, so I decided to break it open. It was a process I felt would be right at home being documented here.
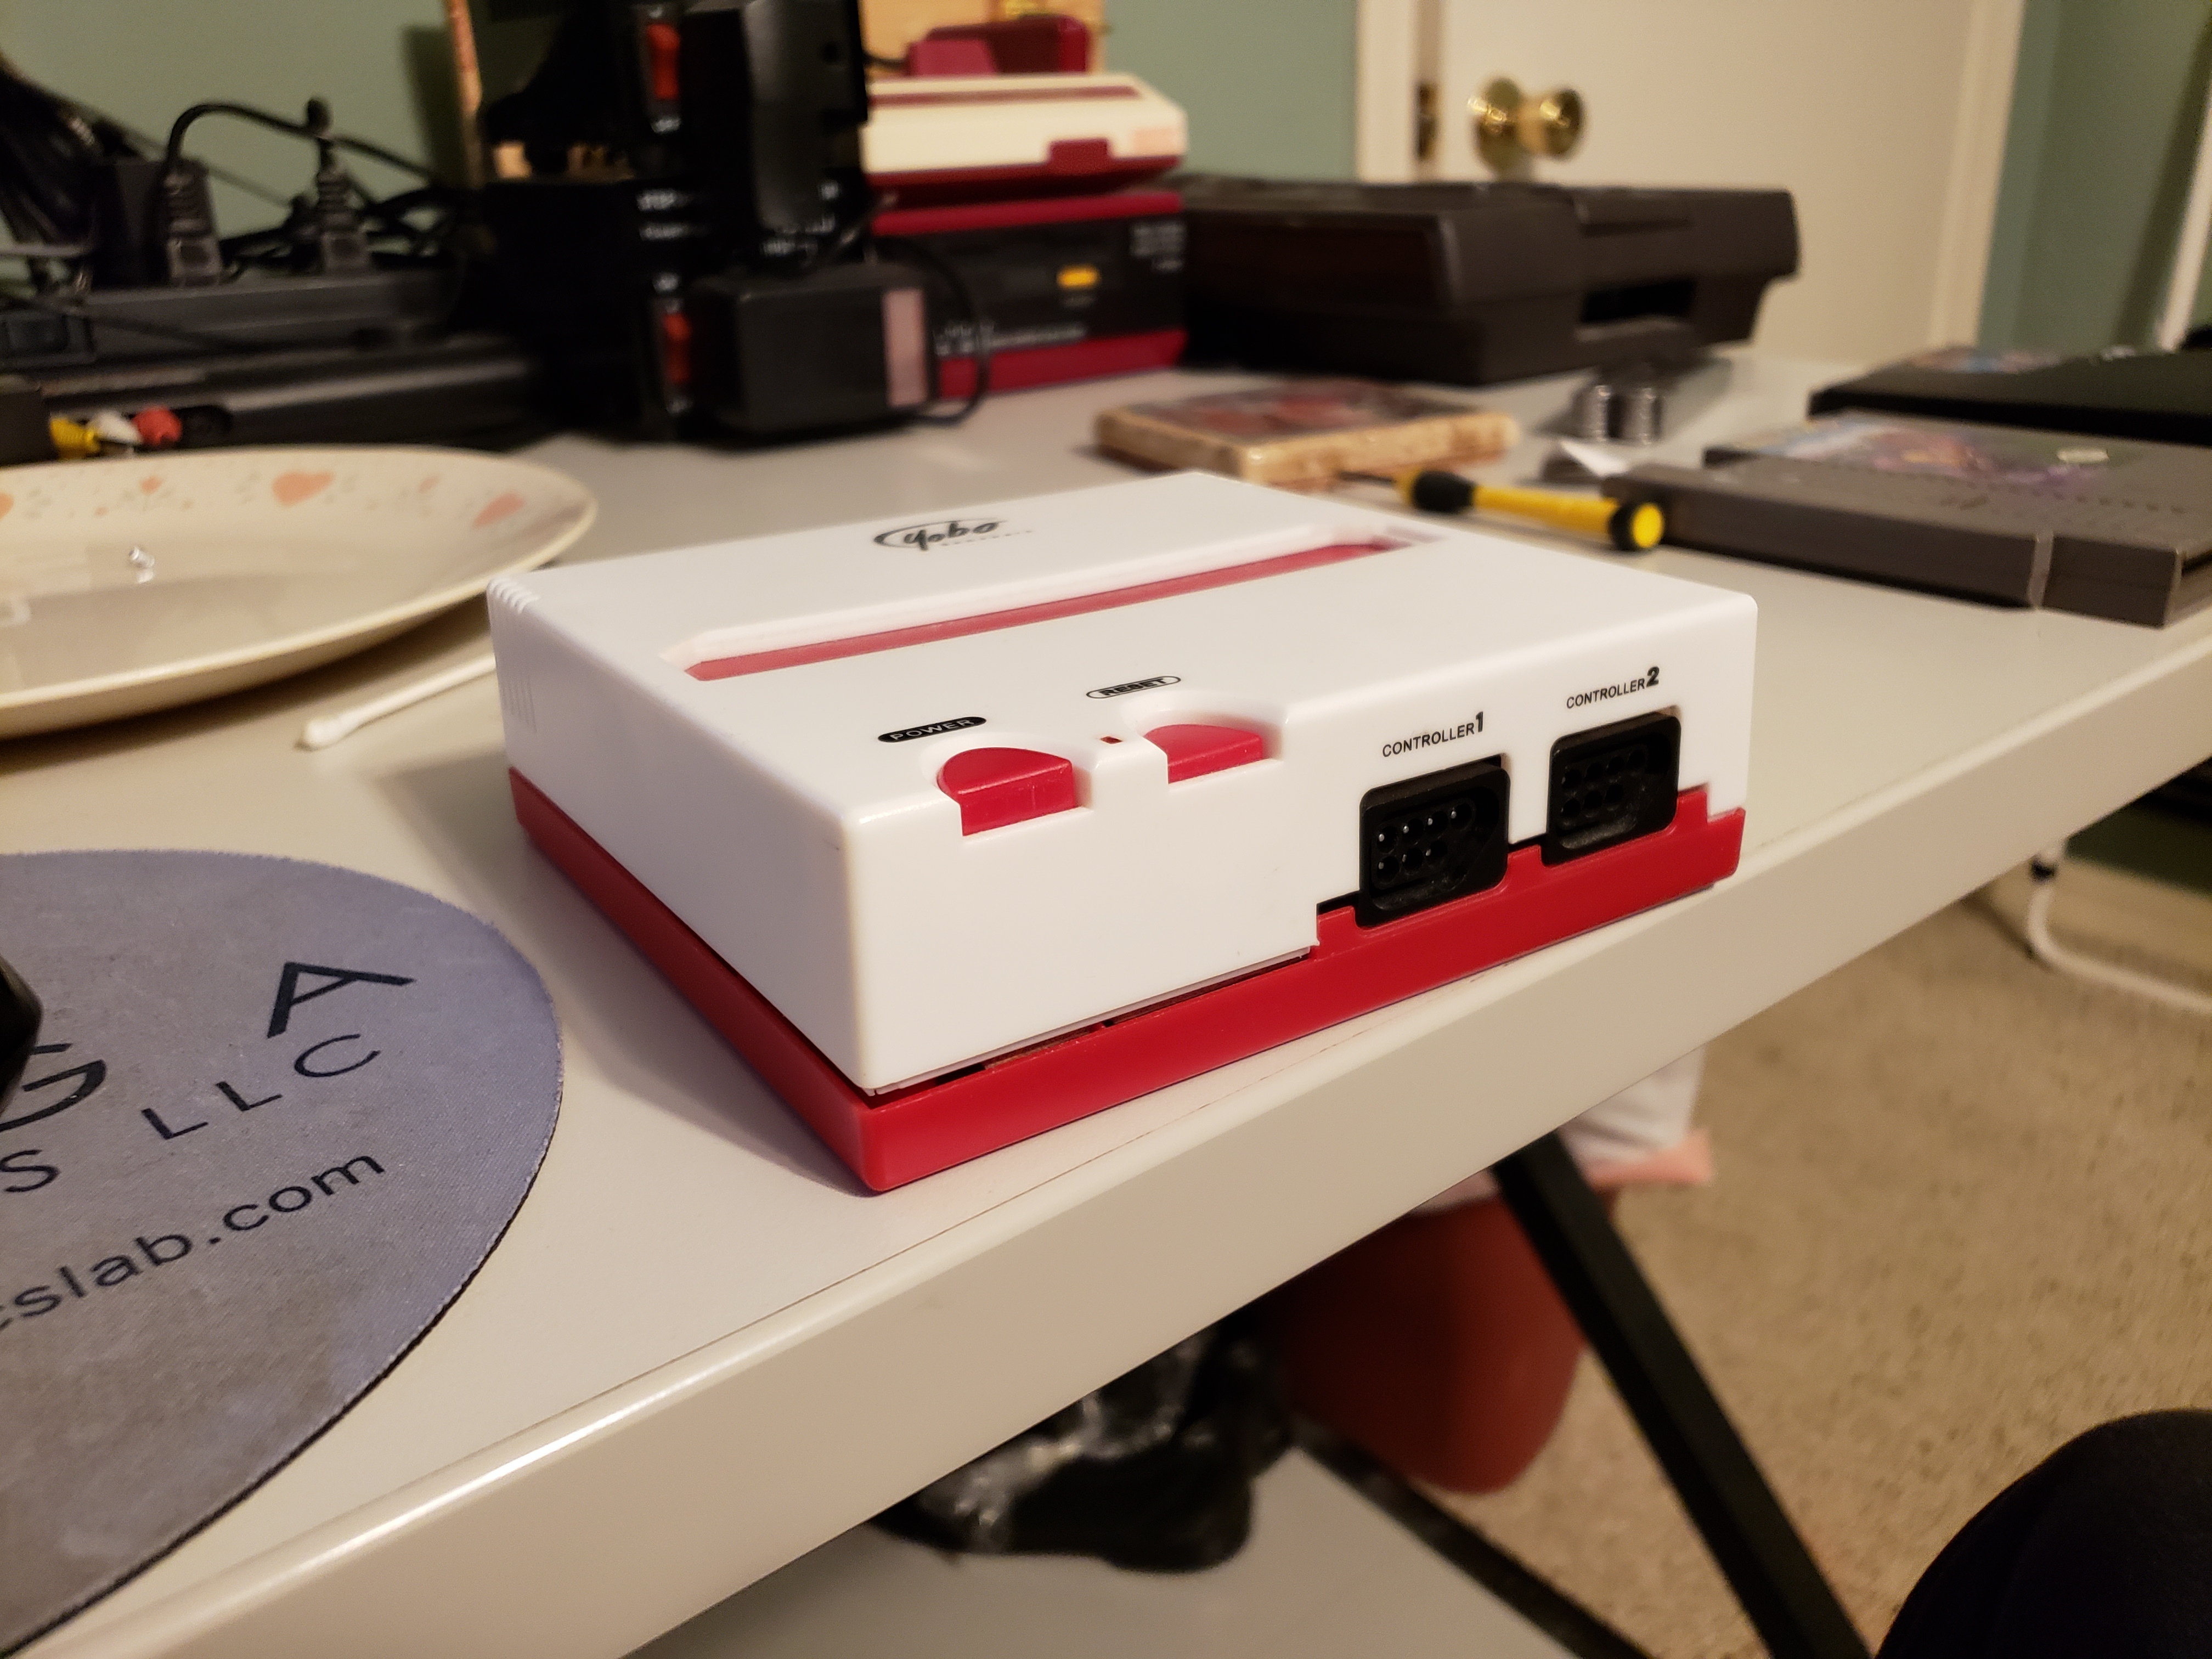
The system itself is rather small, much smaller than the first gen ‘VCR’ NES consoles. It’s also a top-loader, and like other top-loading NES consoles it has no lock-out functionality nor region-locking (Between PAL and NTSC, JP carts have a different pin layout at 60 pins instead of 72).
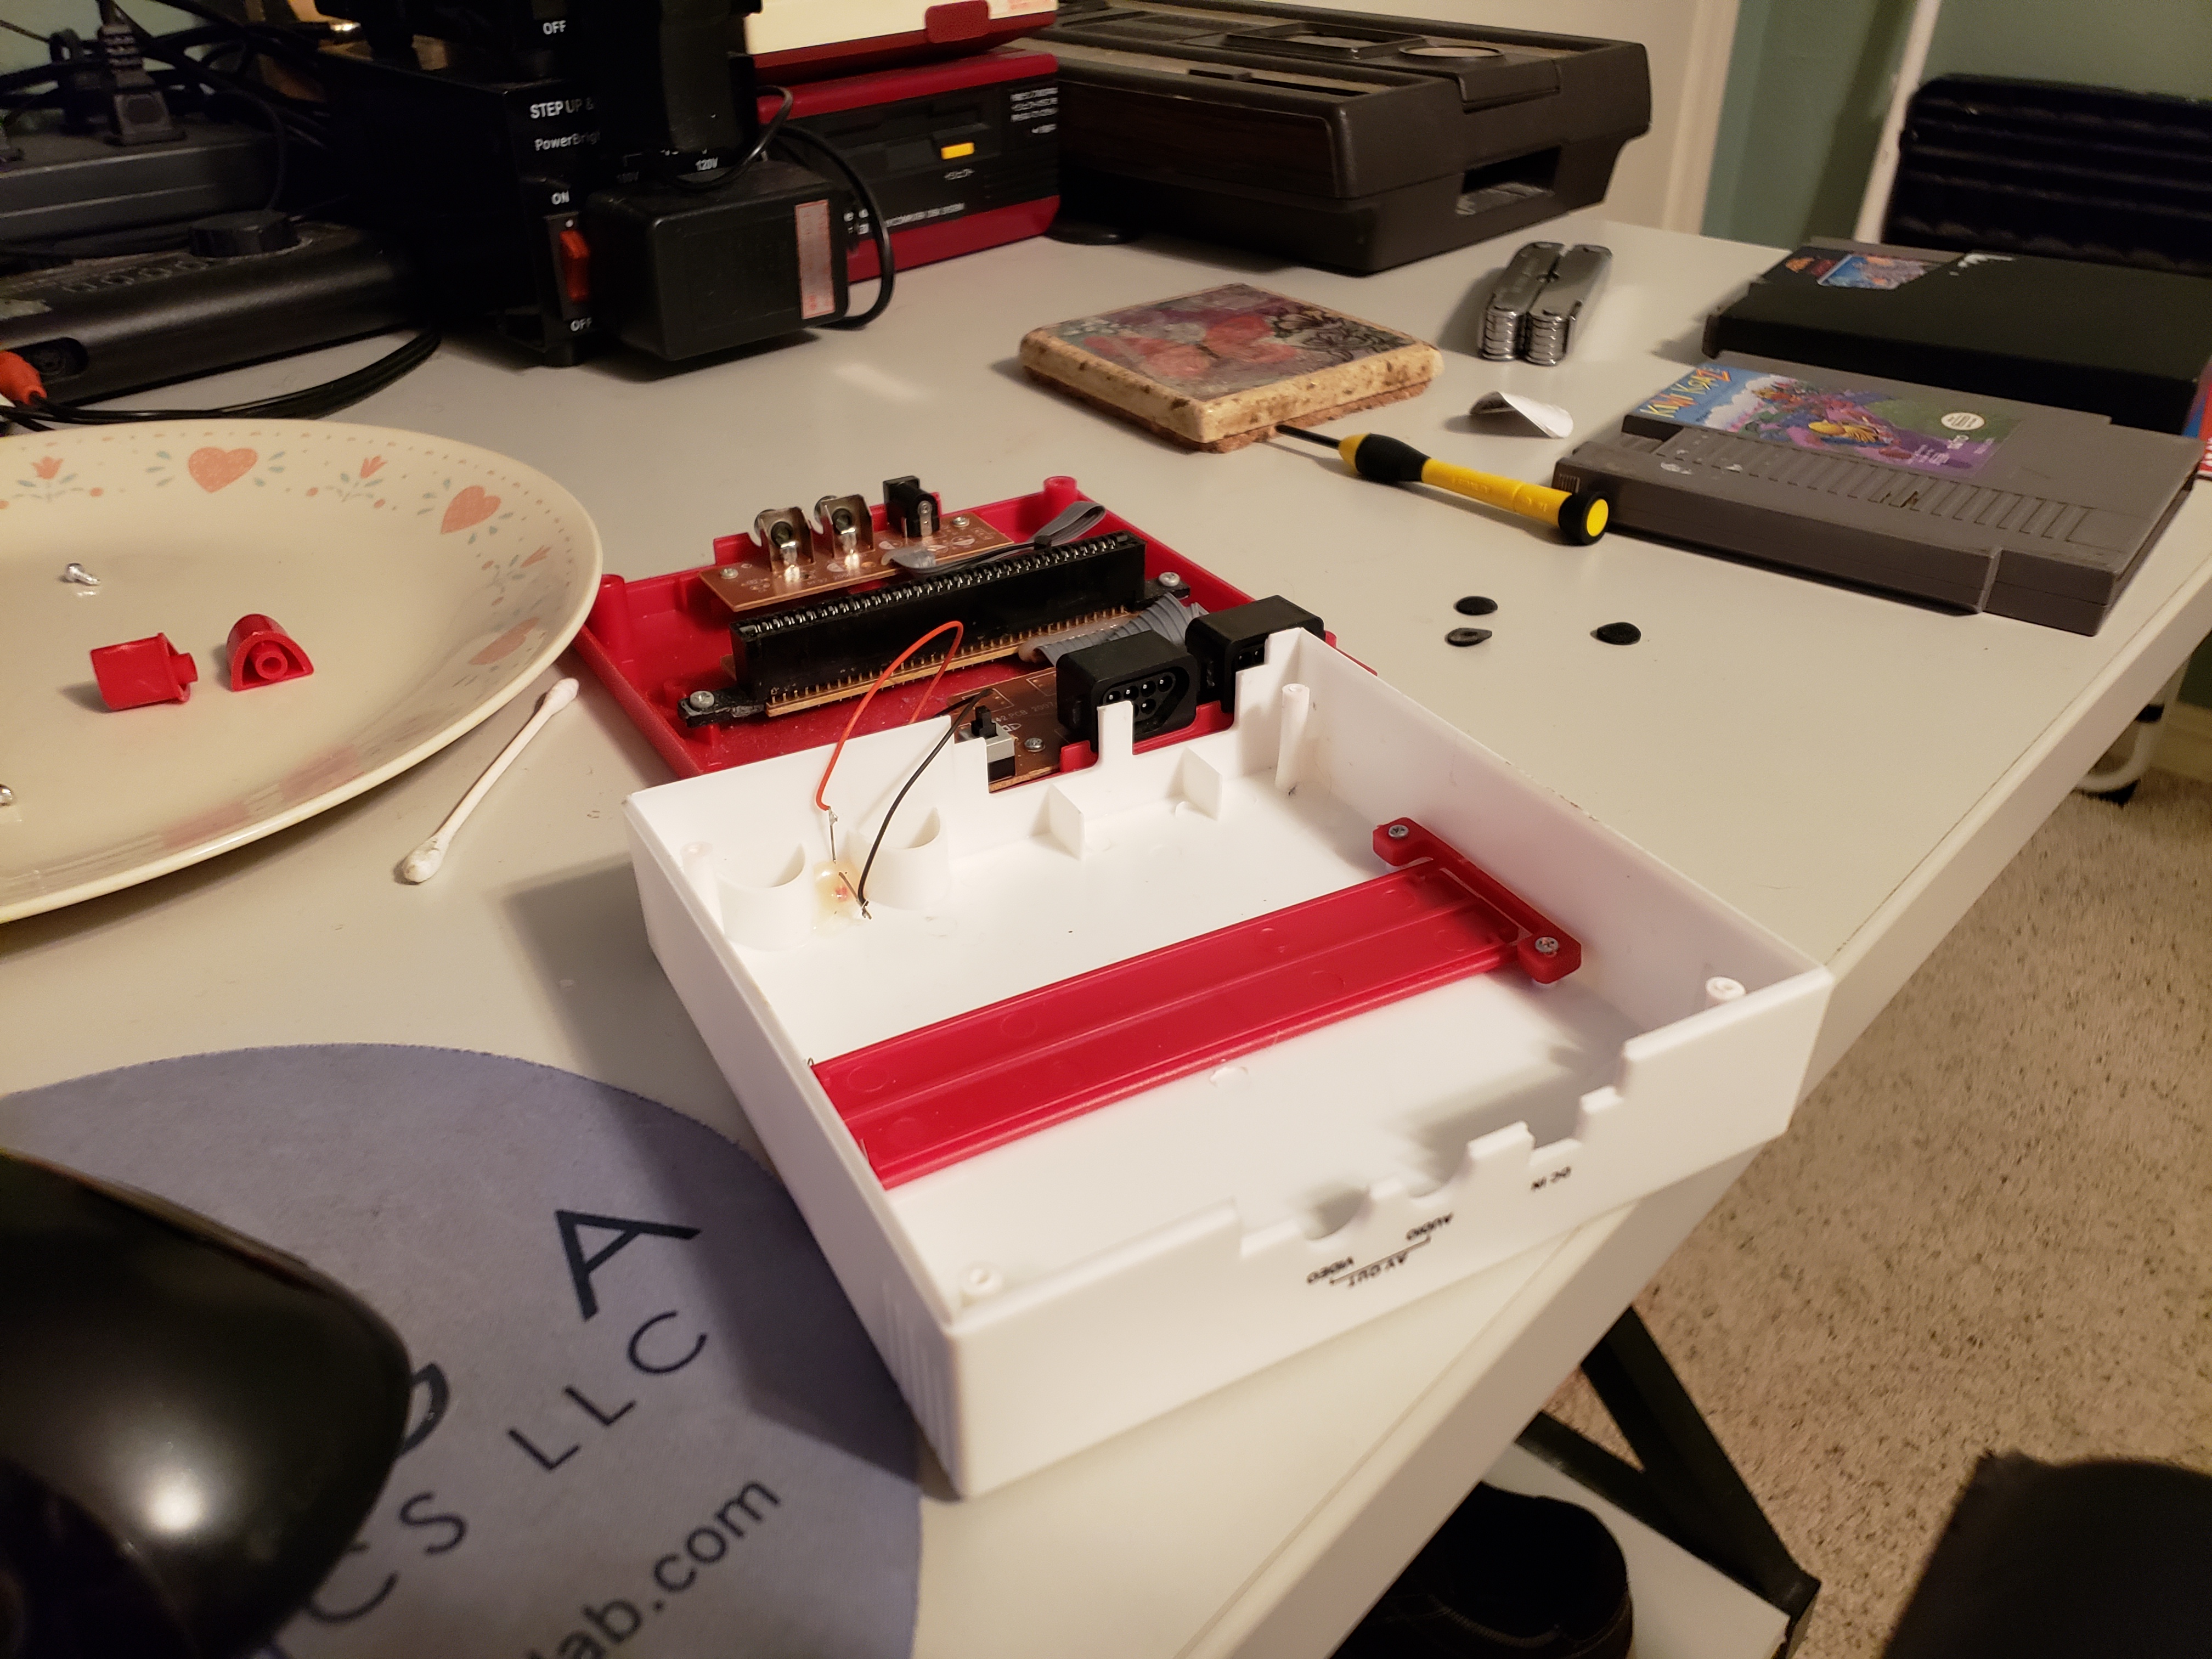
Here’s the console broken open. As an aside, it annoys me when electronics hide their case screens under rubber feet, which this did. The rubber feet are so cheap I didn’t think I’d bother putting them back on.
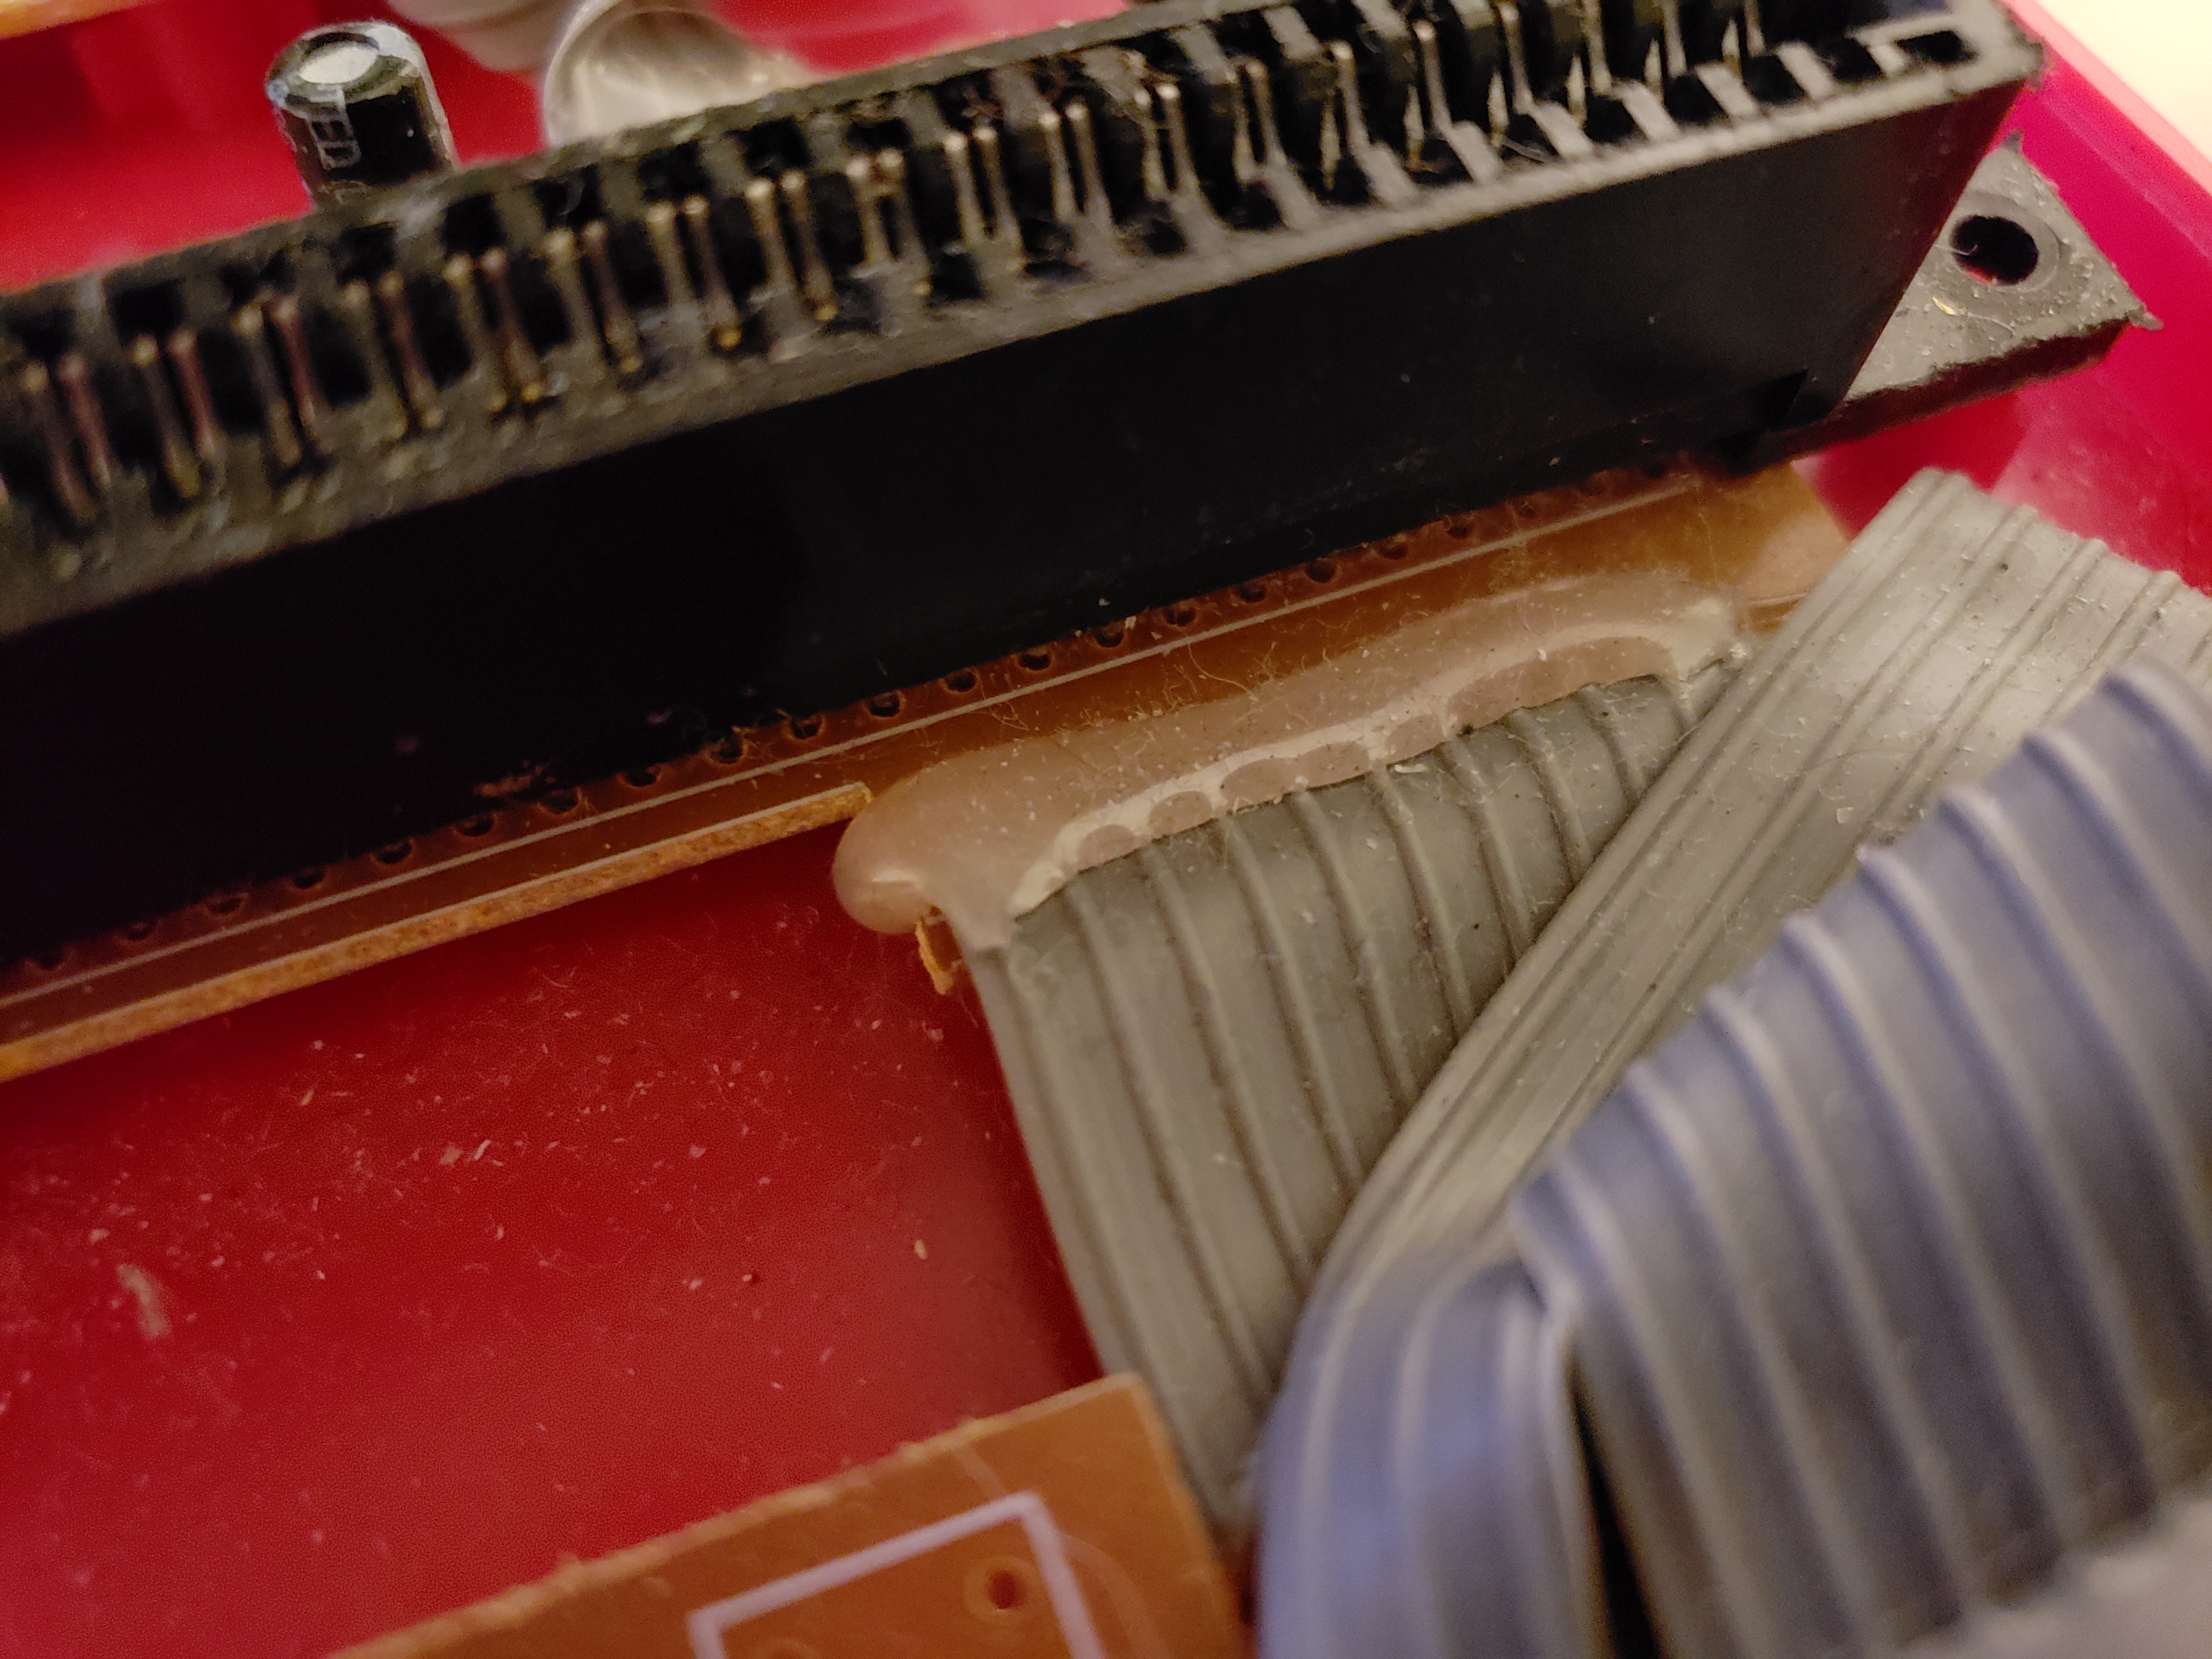
The craftsman ship is a little shoddy to say the least, thought I don’t imagine these things sell for 25$ because of quality. Glue is strewn about the system in place of proper solder, and it looks to be made up of 3 generic boards, as spaces for resistors and capacitors are marked on the boards with nothing inserted into the slots.
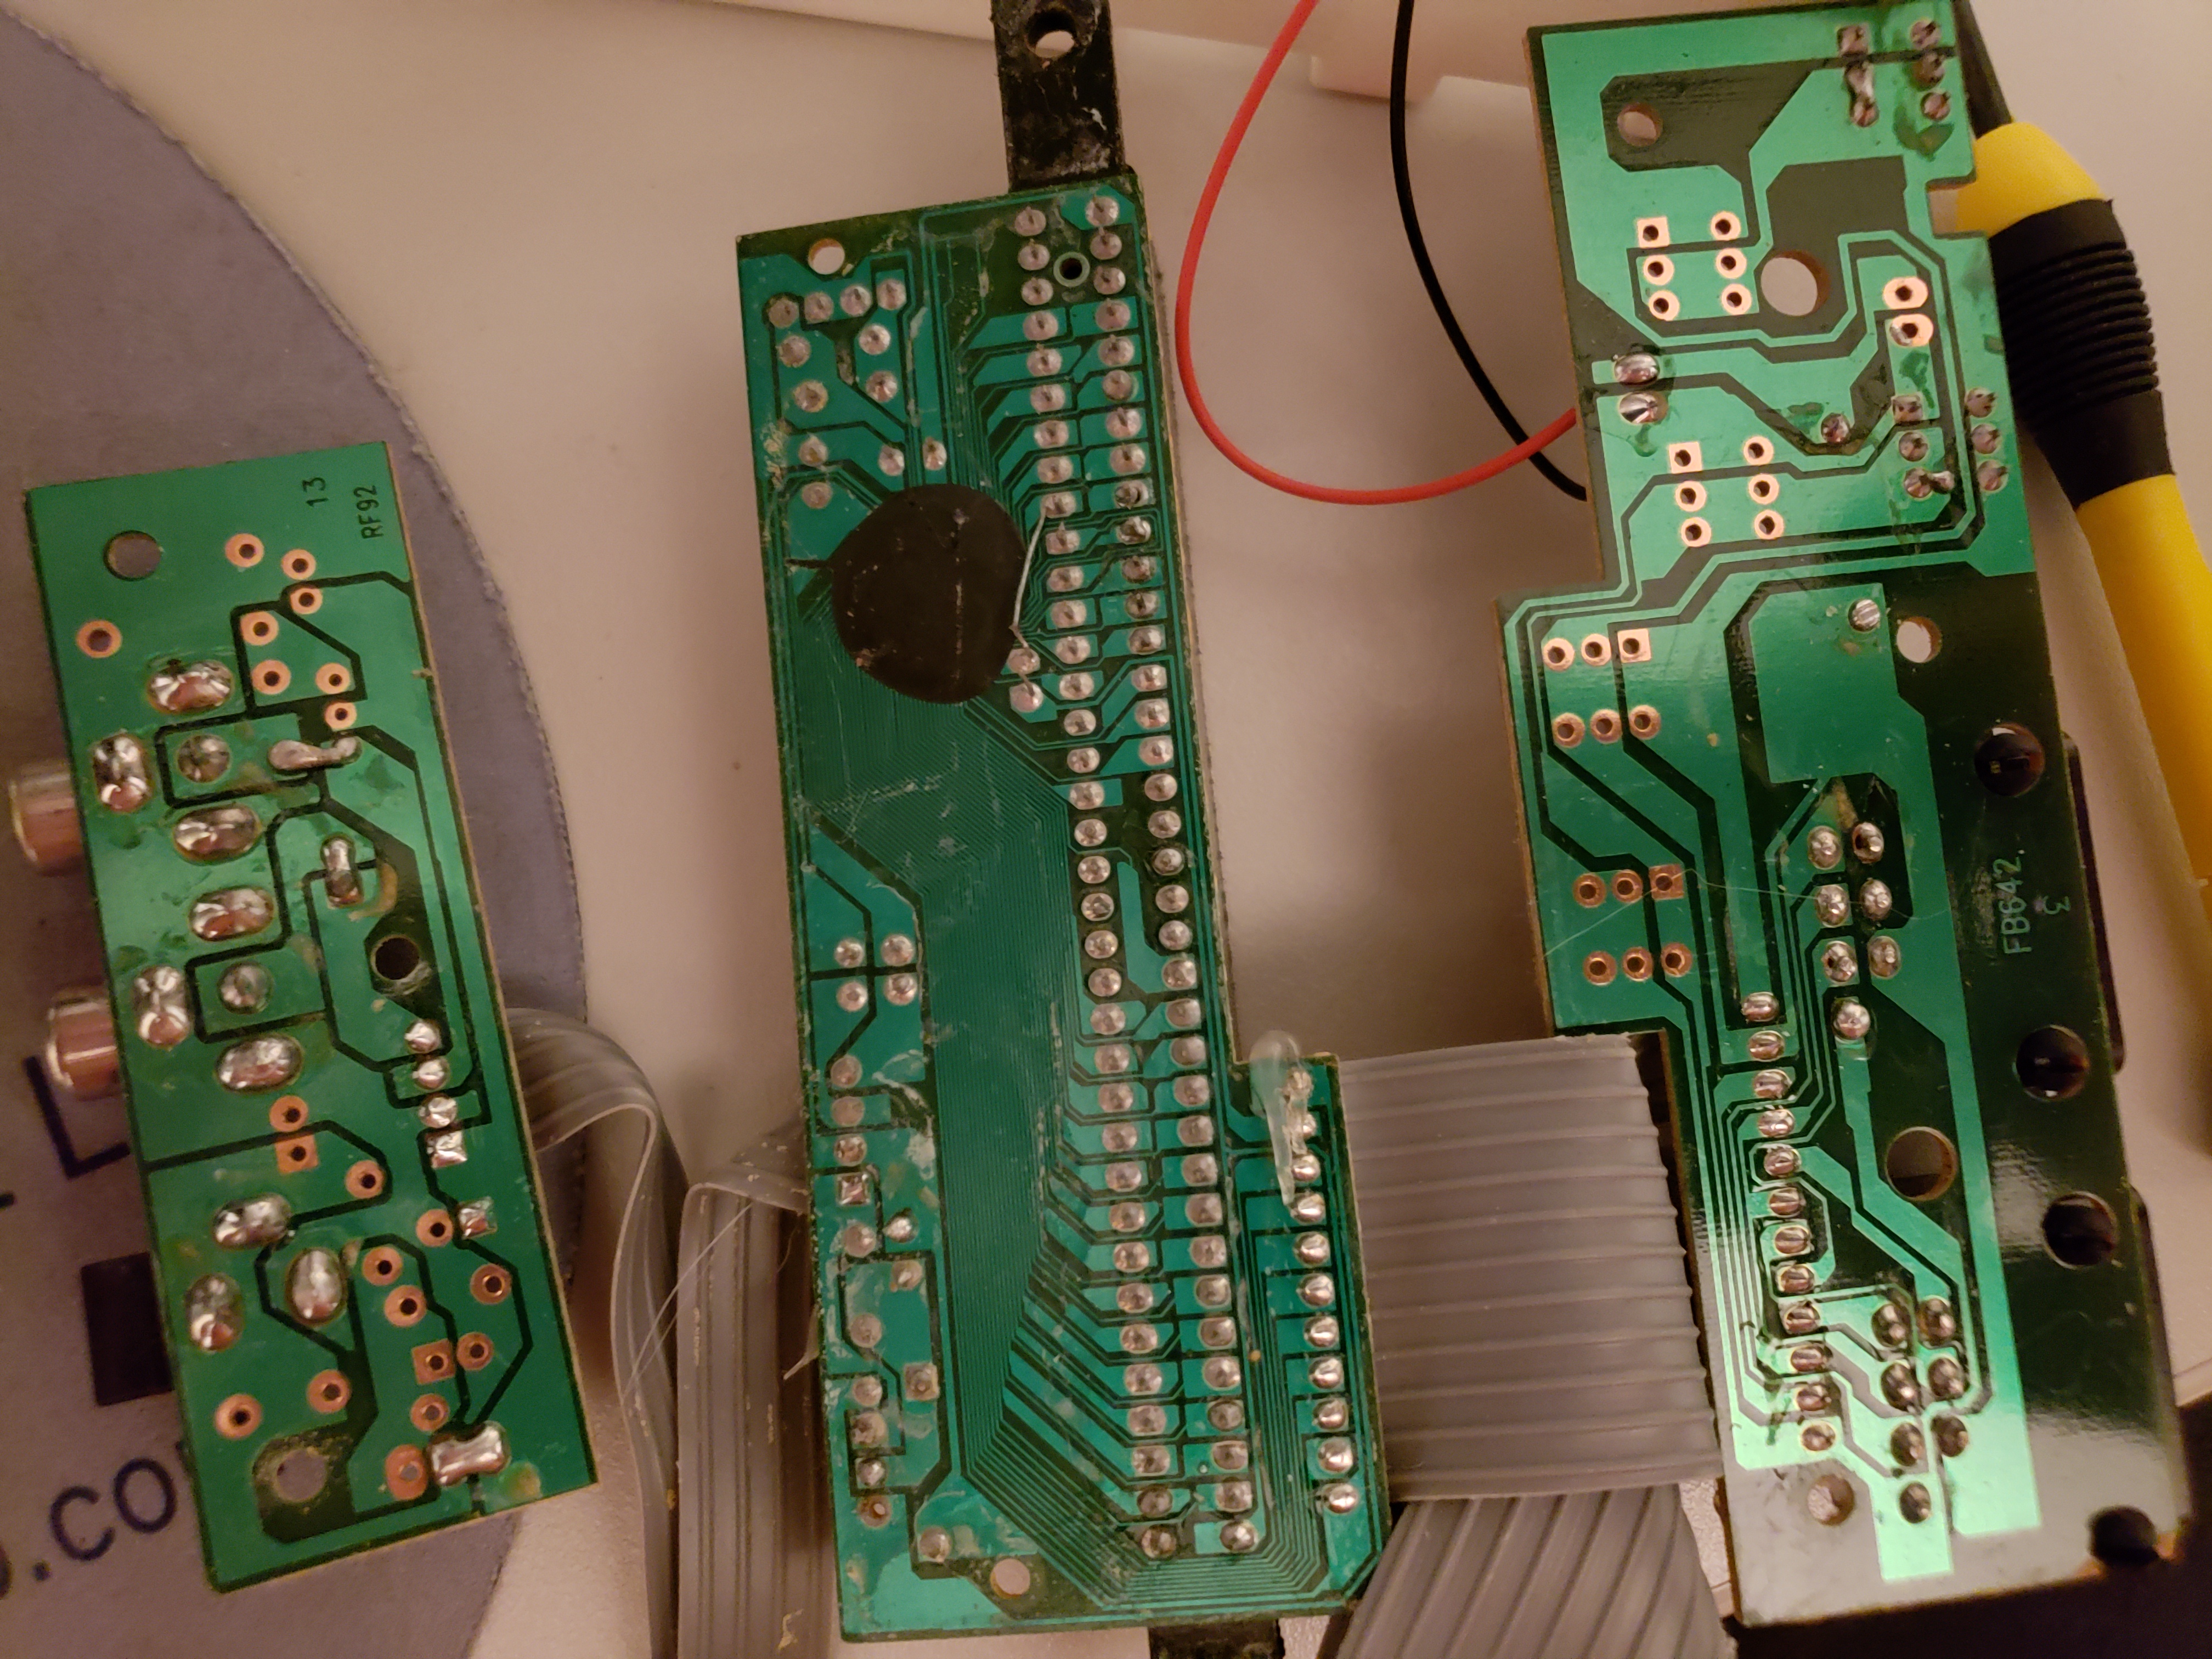
Looking at the underside of the board it looks fairly standard, not a lot to see. It’s just a printed board that’s a bit dirty. There’s a lot of dirt and what looks to be corrosion.
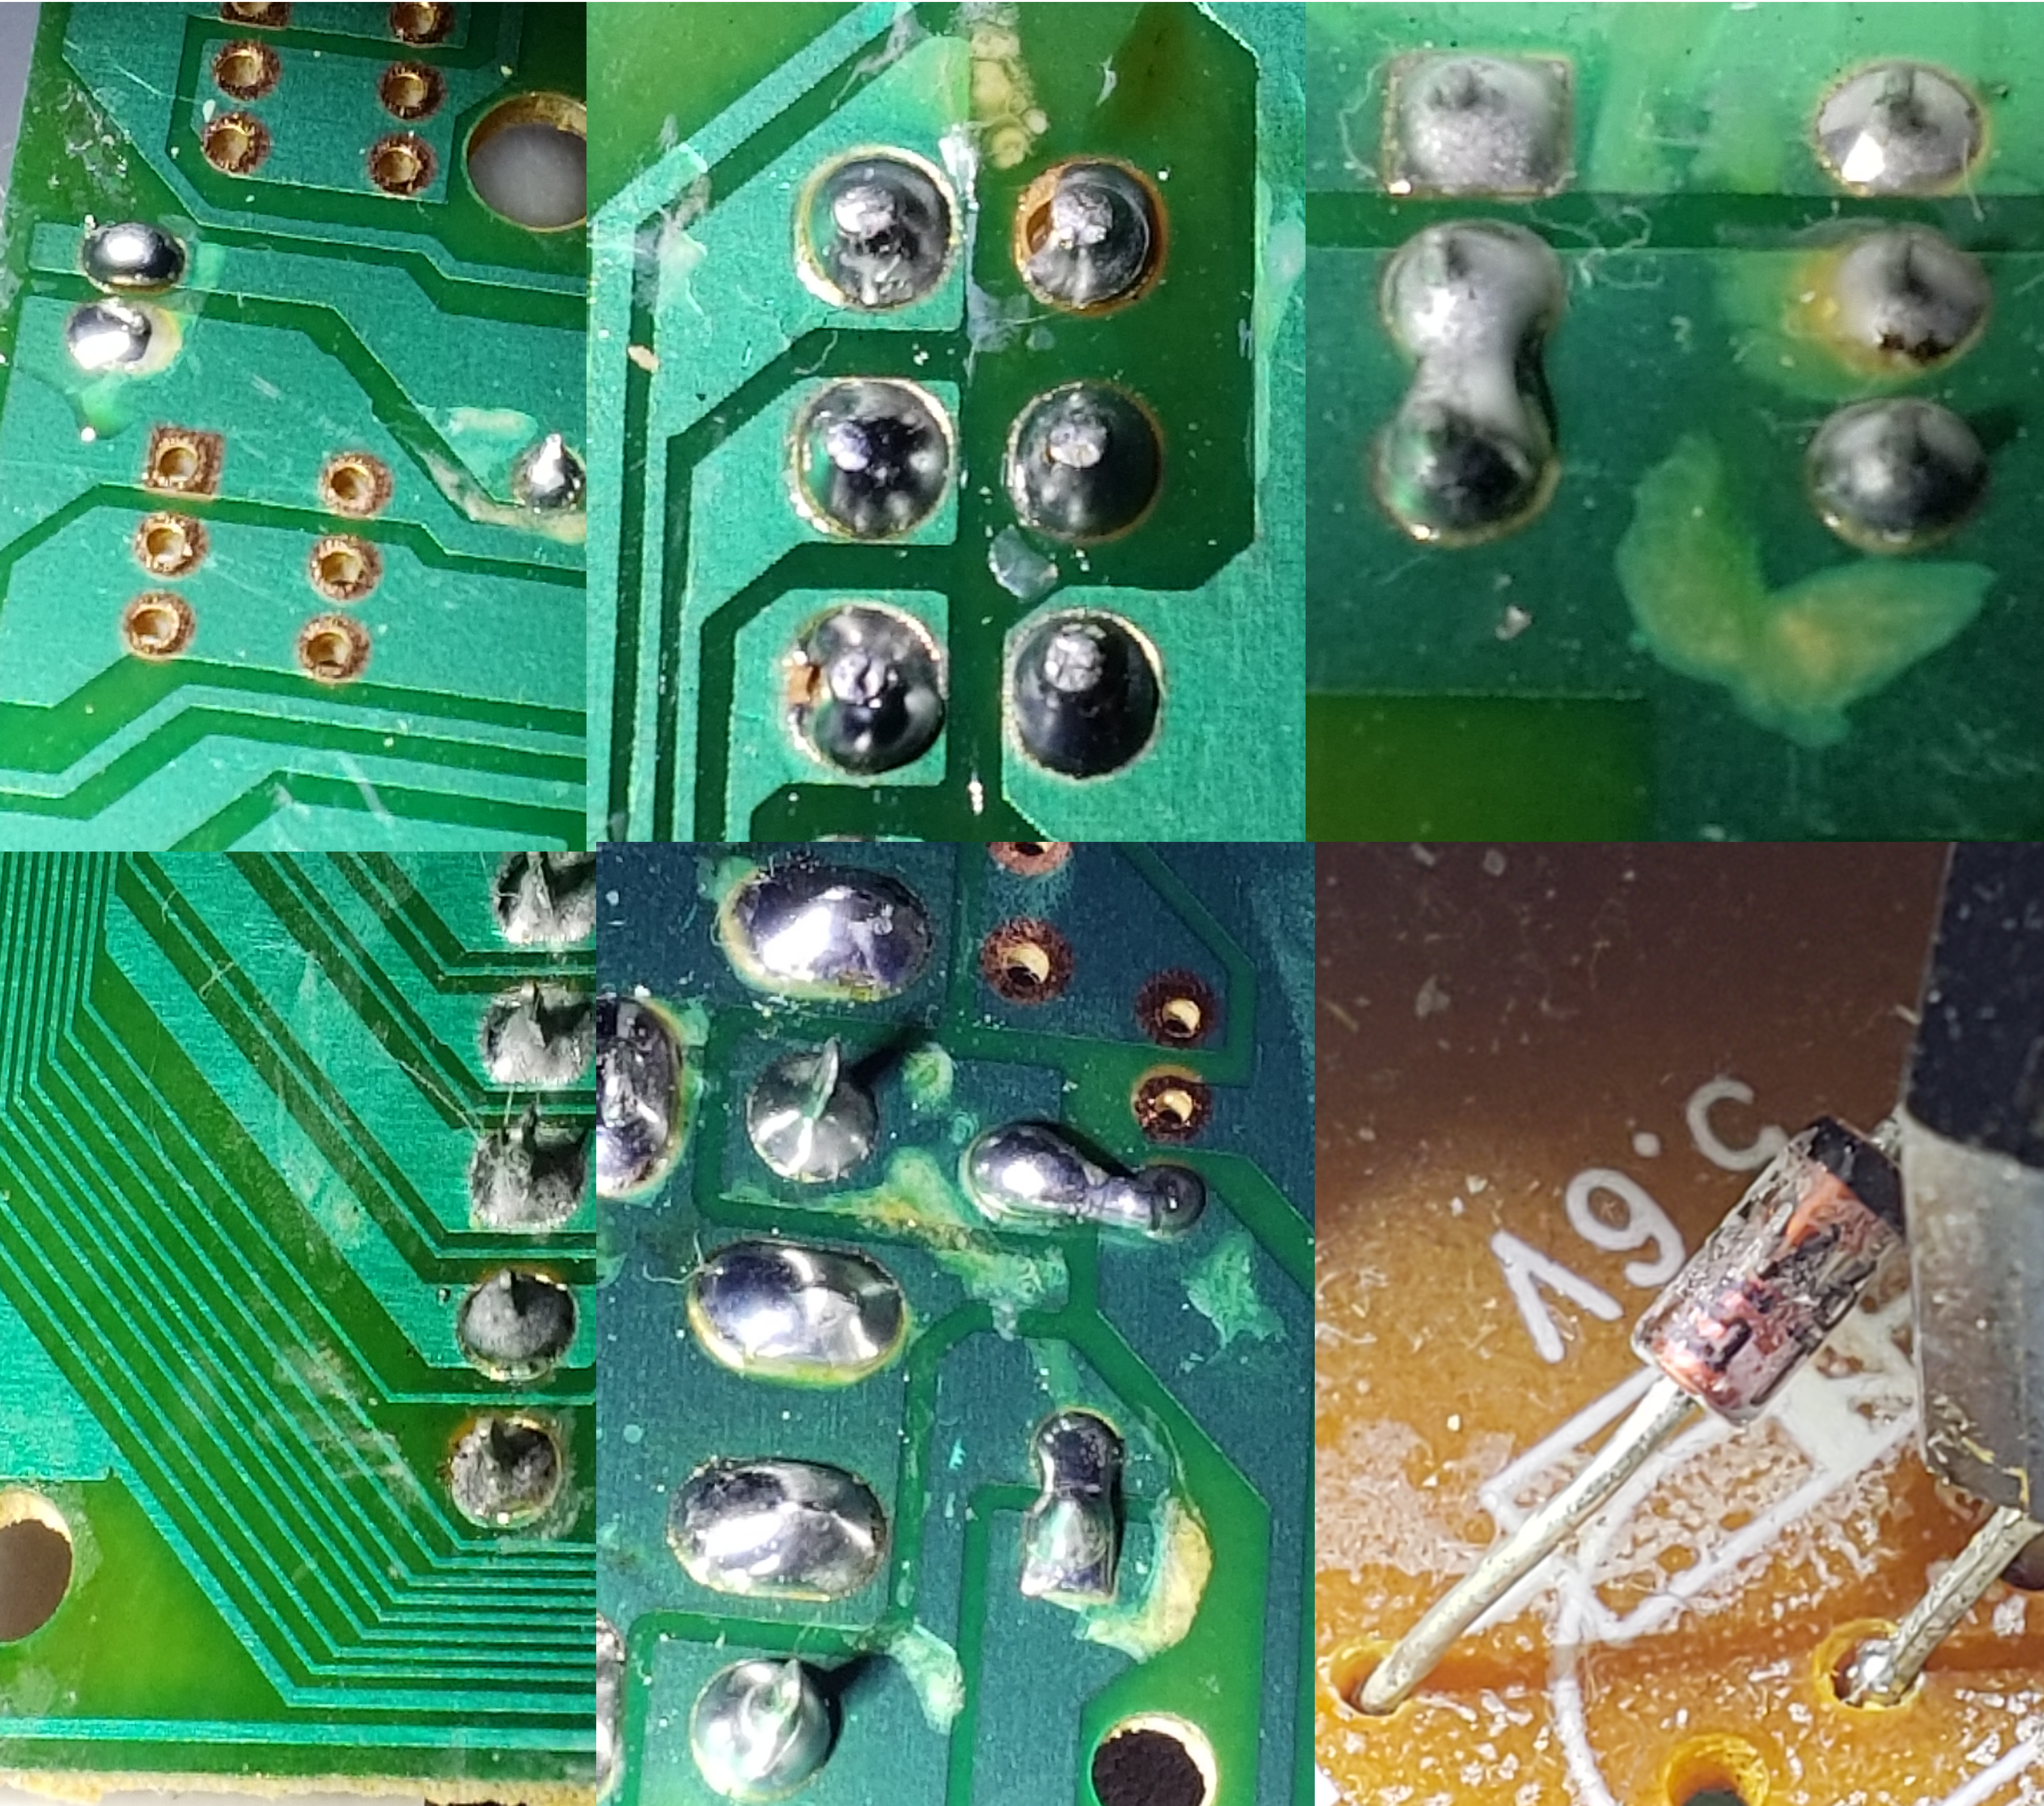
There’s a possibility corrosion could break a trace, though that’d more likely render the system totally inoperable, not just make select games not work. Of course, in the real world, physics can be a finicky thing. Would it be possible for a data line to be ever so slightly garbled such that it wouldn’t affect more simple games but in something like LoZ it causes problems? Probably not, though it’s still worth giving the boards a once-over with some q-tips and alcohol.
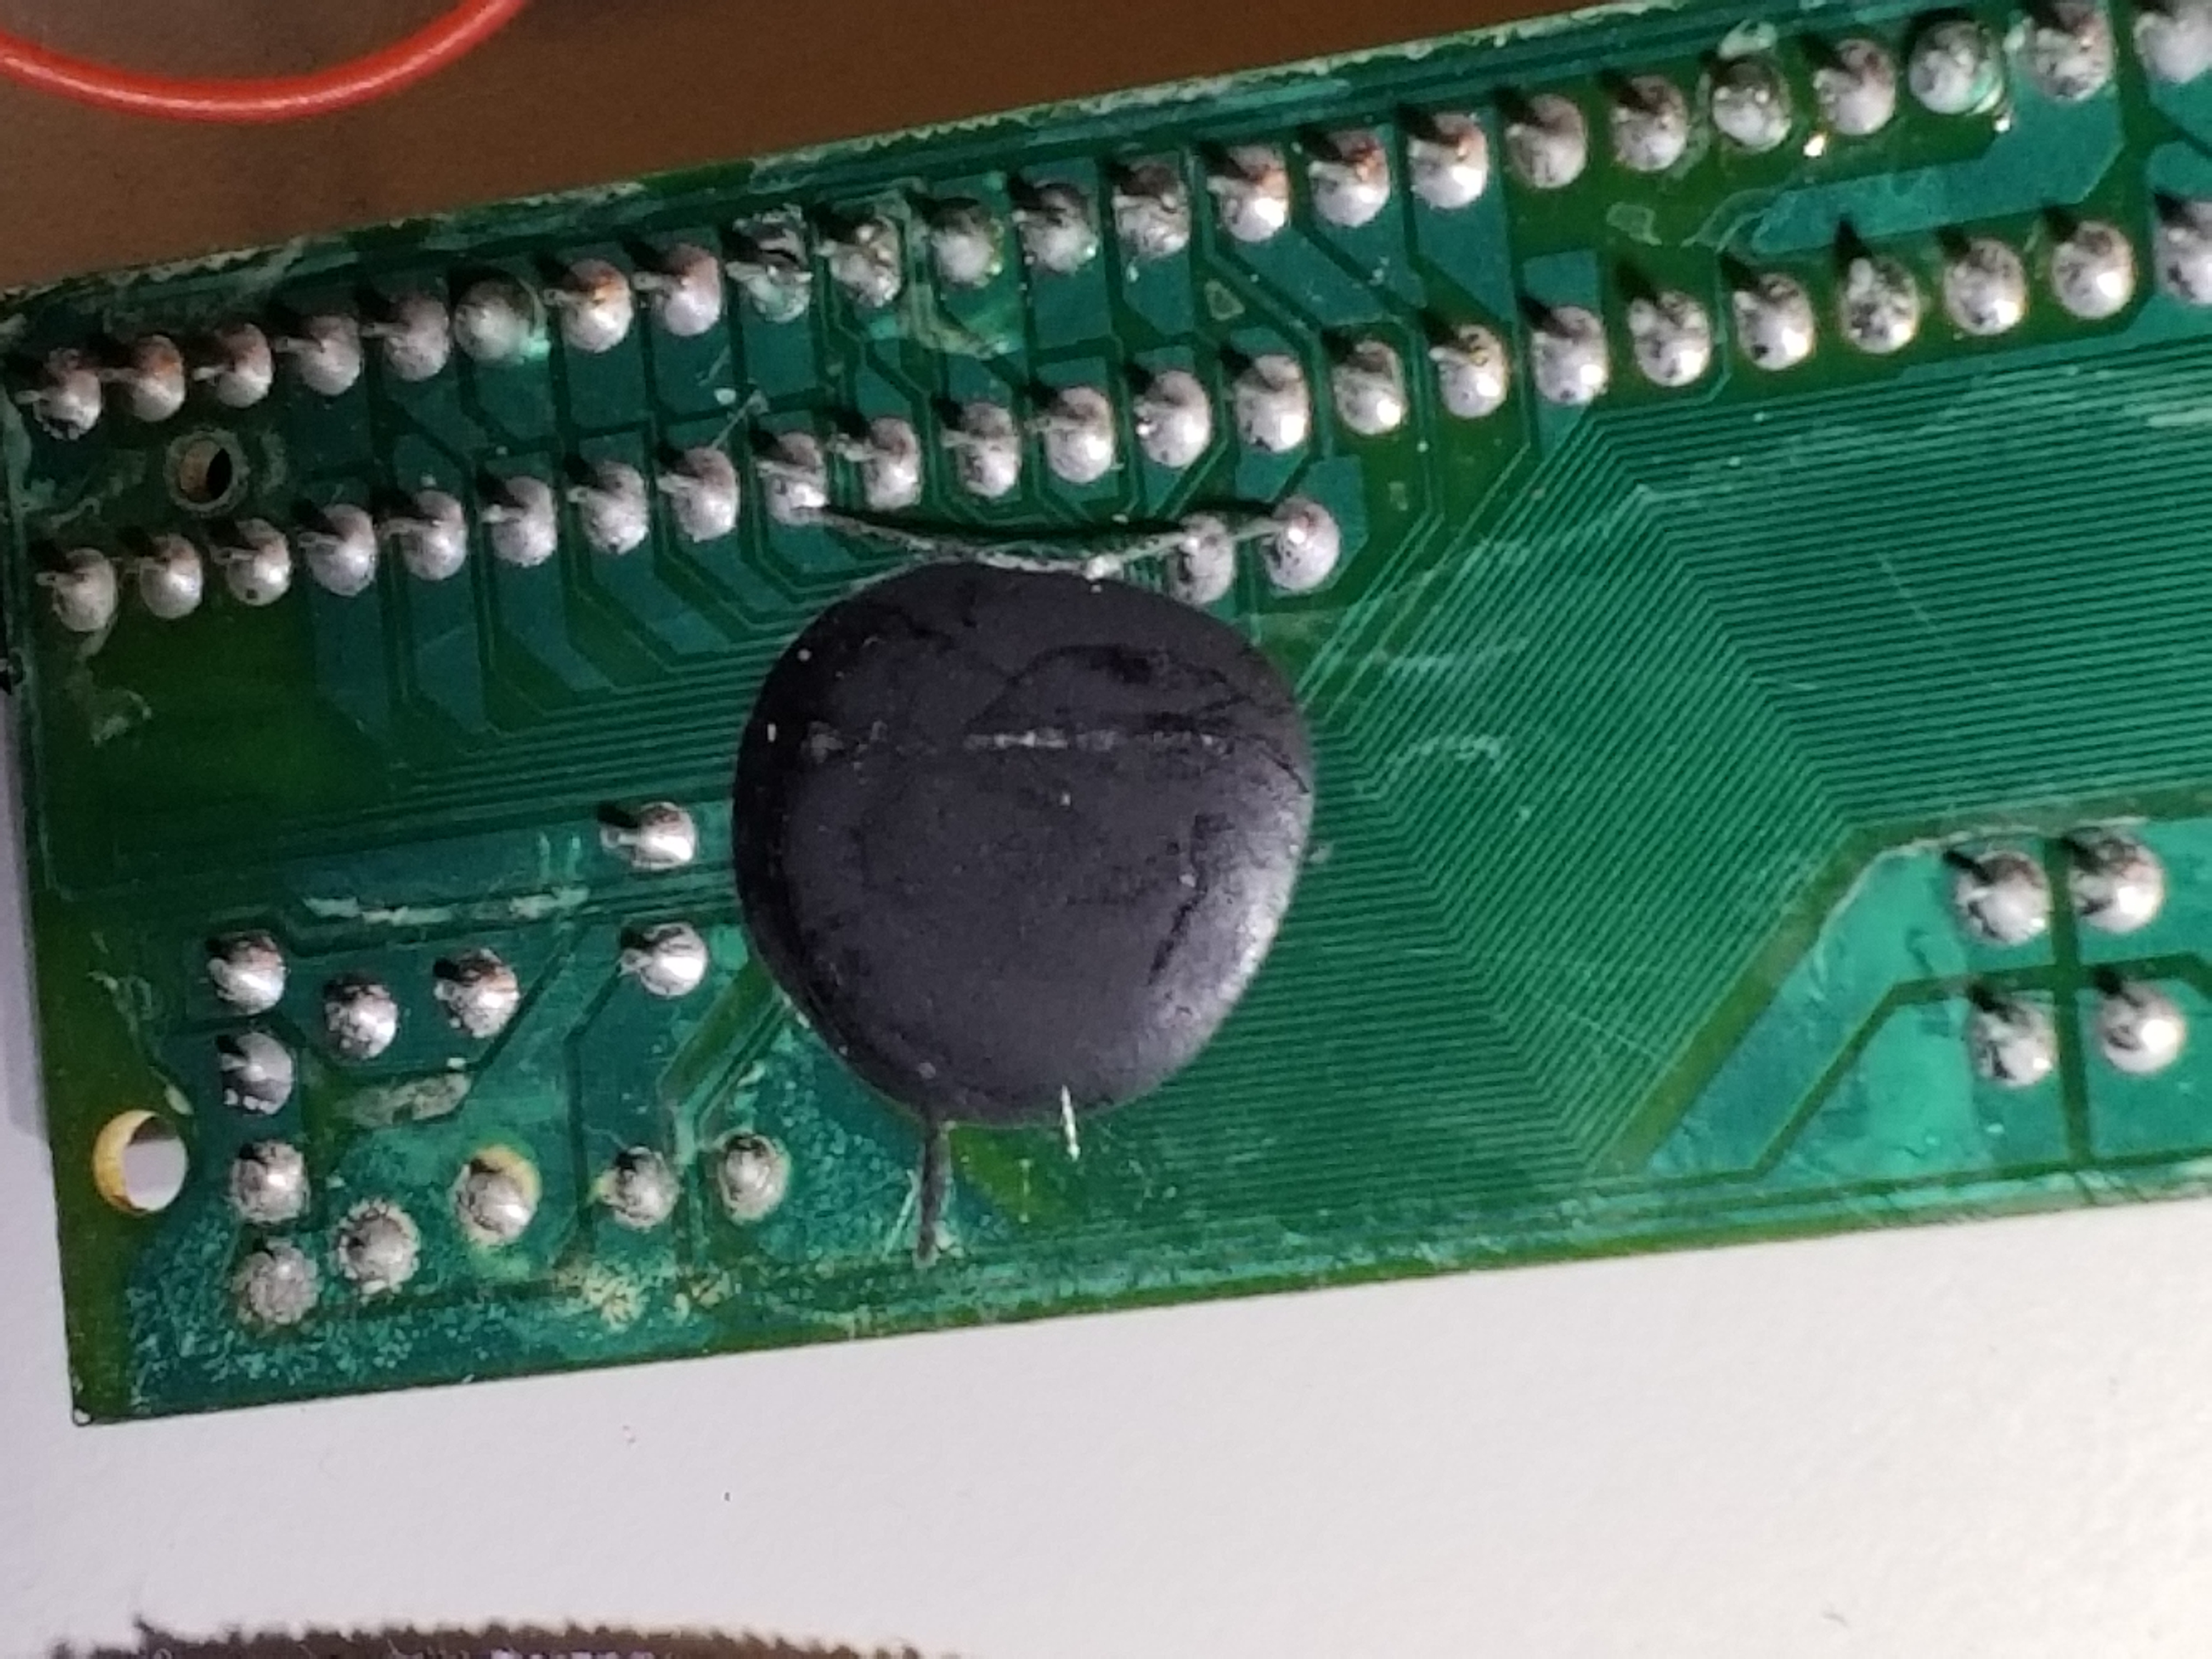
Wanting to get a better feel for the system, I needed to find where the CPU was. Where was the sound chip? RAM? The boards were bare save for a few resistors and capacitors. Looking at it, I think this black blob is where the CPU is housed, considering all the traces going into it. Most likely it houses everything, all in that tiny space. Makes you appreciate how far technology has come.
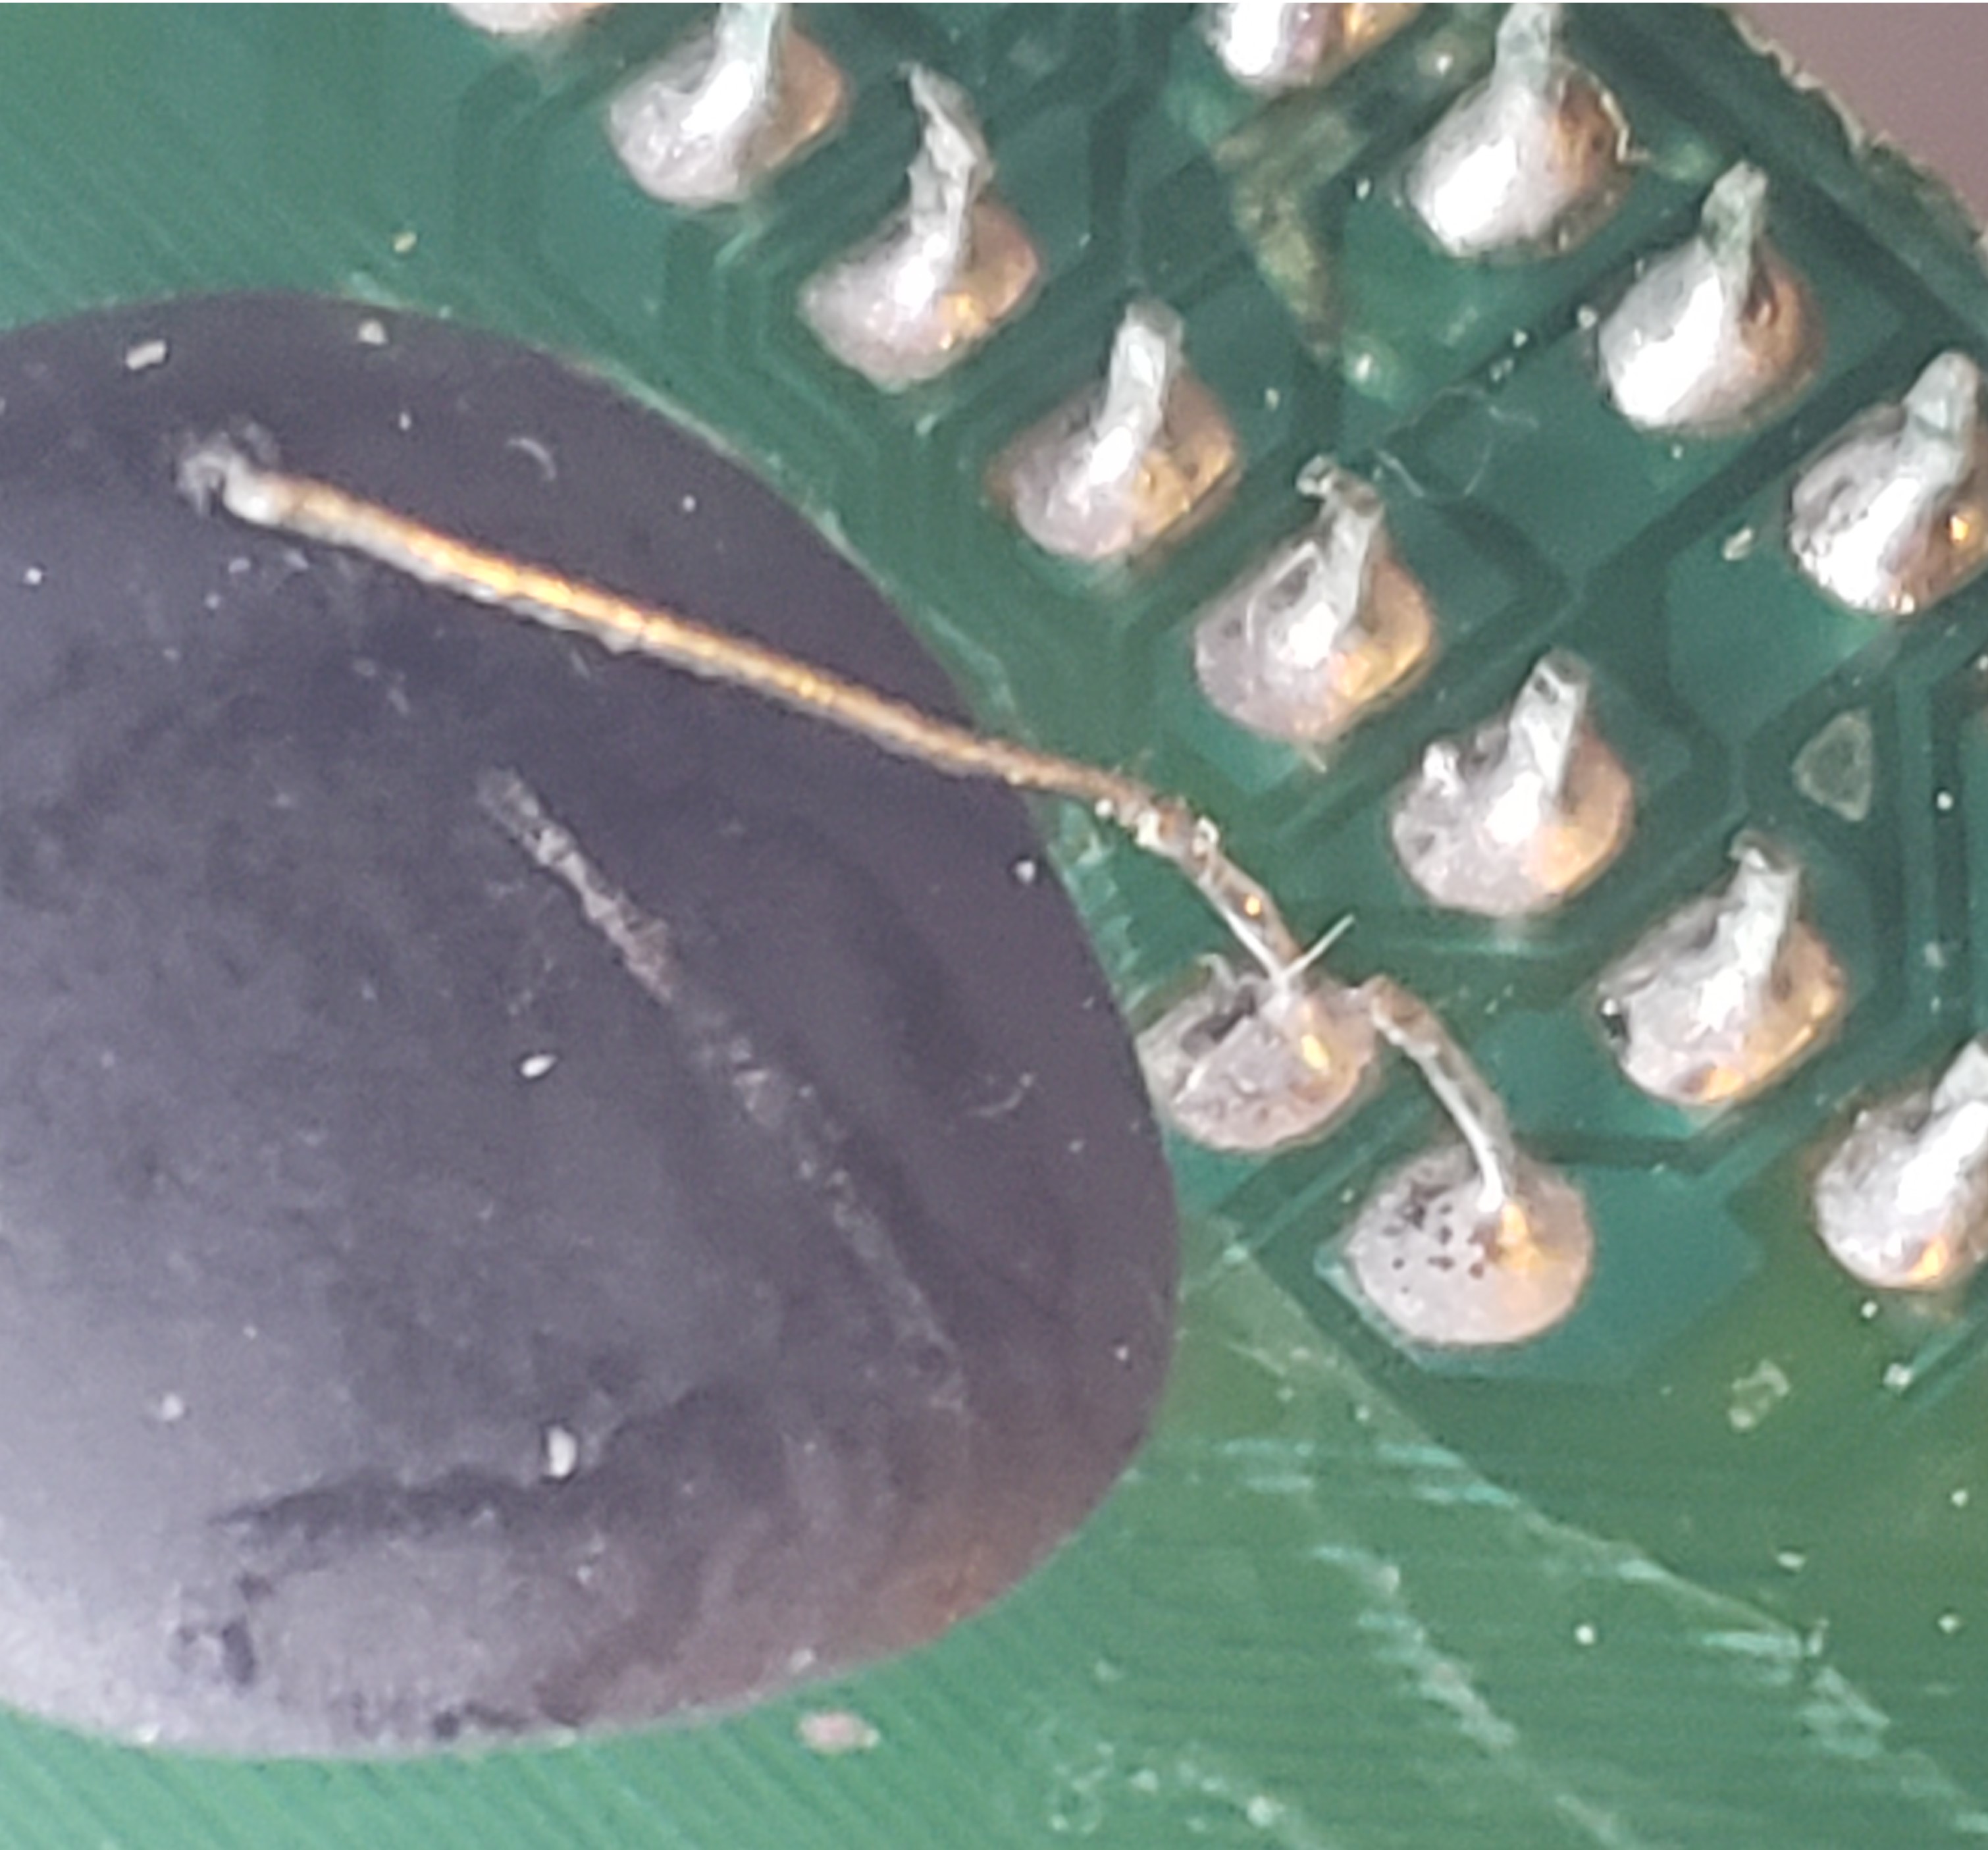
That’s when I noticed something. One of the resistors on the board had a lead that had been soldered in but not snipped off. It was even touching one of the pins for the cartridge slot which possibly meant a short. Let that be a lesson as to why you should always snip your leads when you put a component into a board.
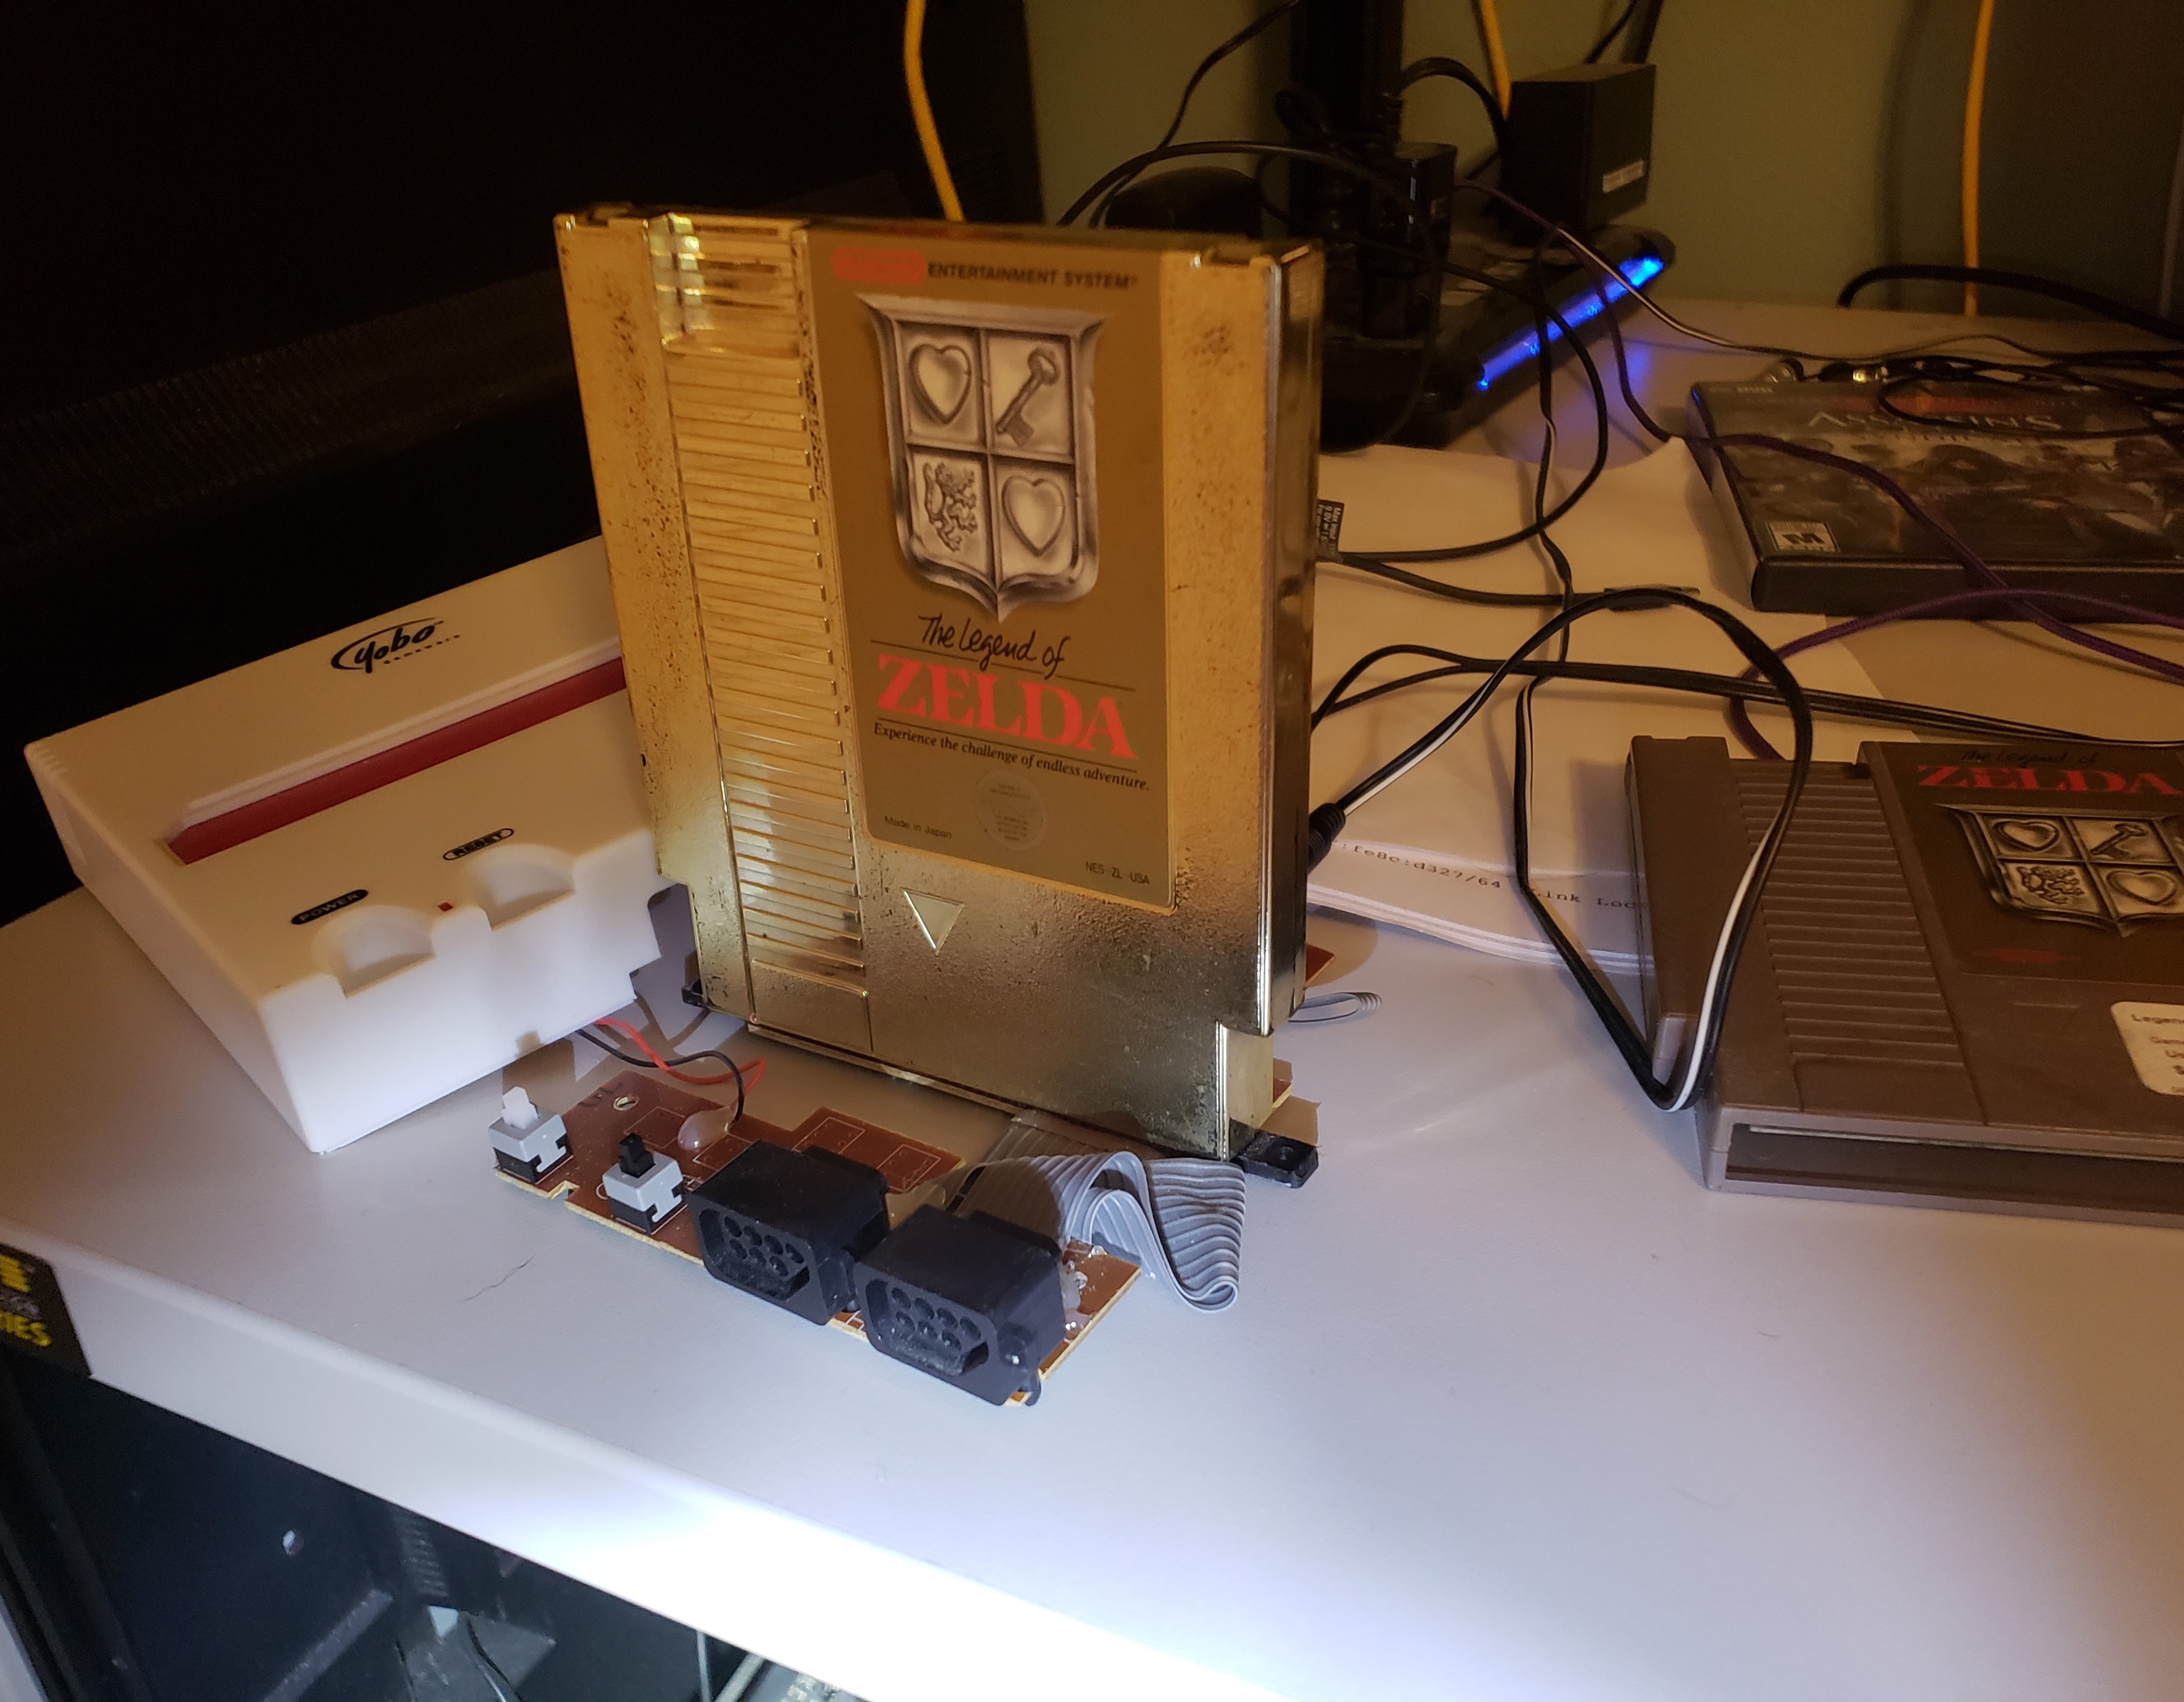
However, testing with the cart still produced the error, no video signal sent to the T.V. Not wanting to give up, I decided to break into the game cart itself to run some tests. The cart is secured with a special kind of screw, some call them ‘gamebit’ screws and others call them ‘security’ screws. Either way, they require a special kind of screwdriver I thankfully had on hand.
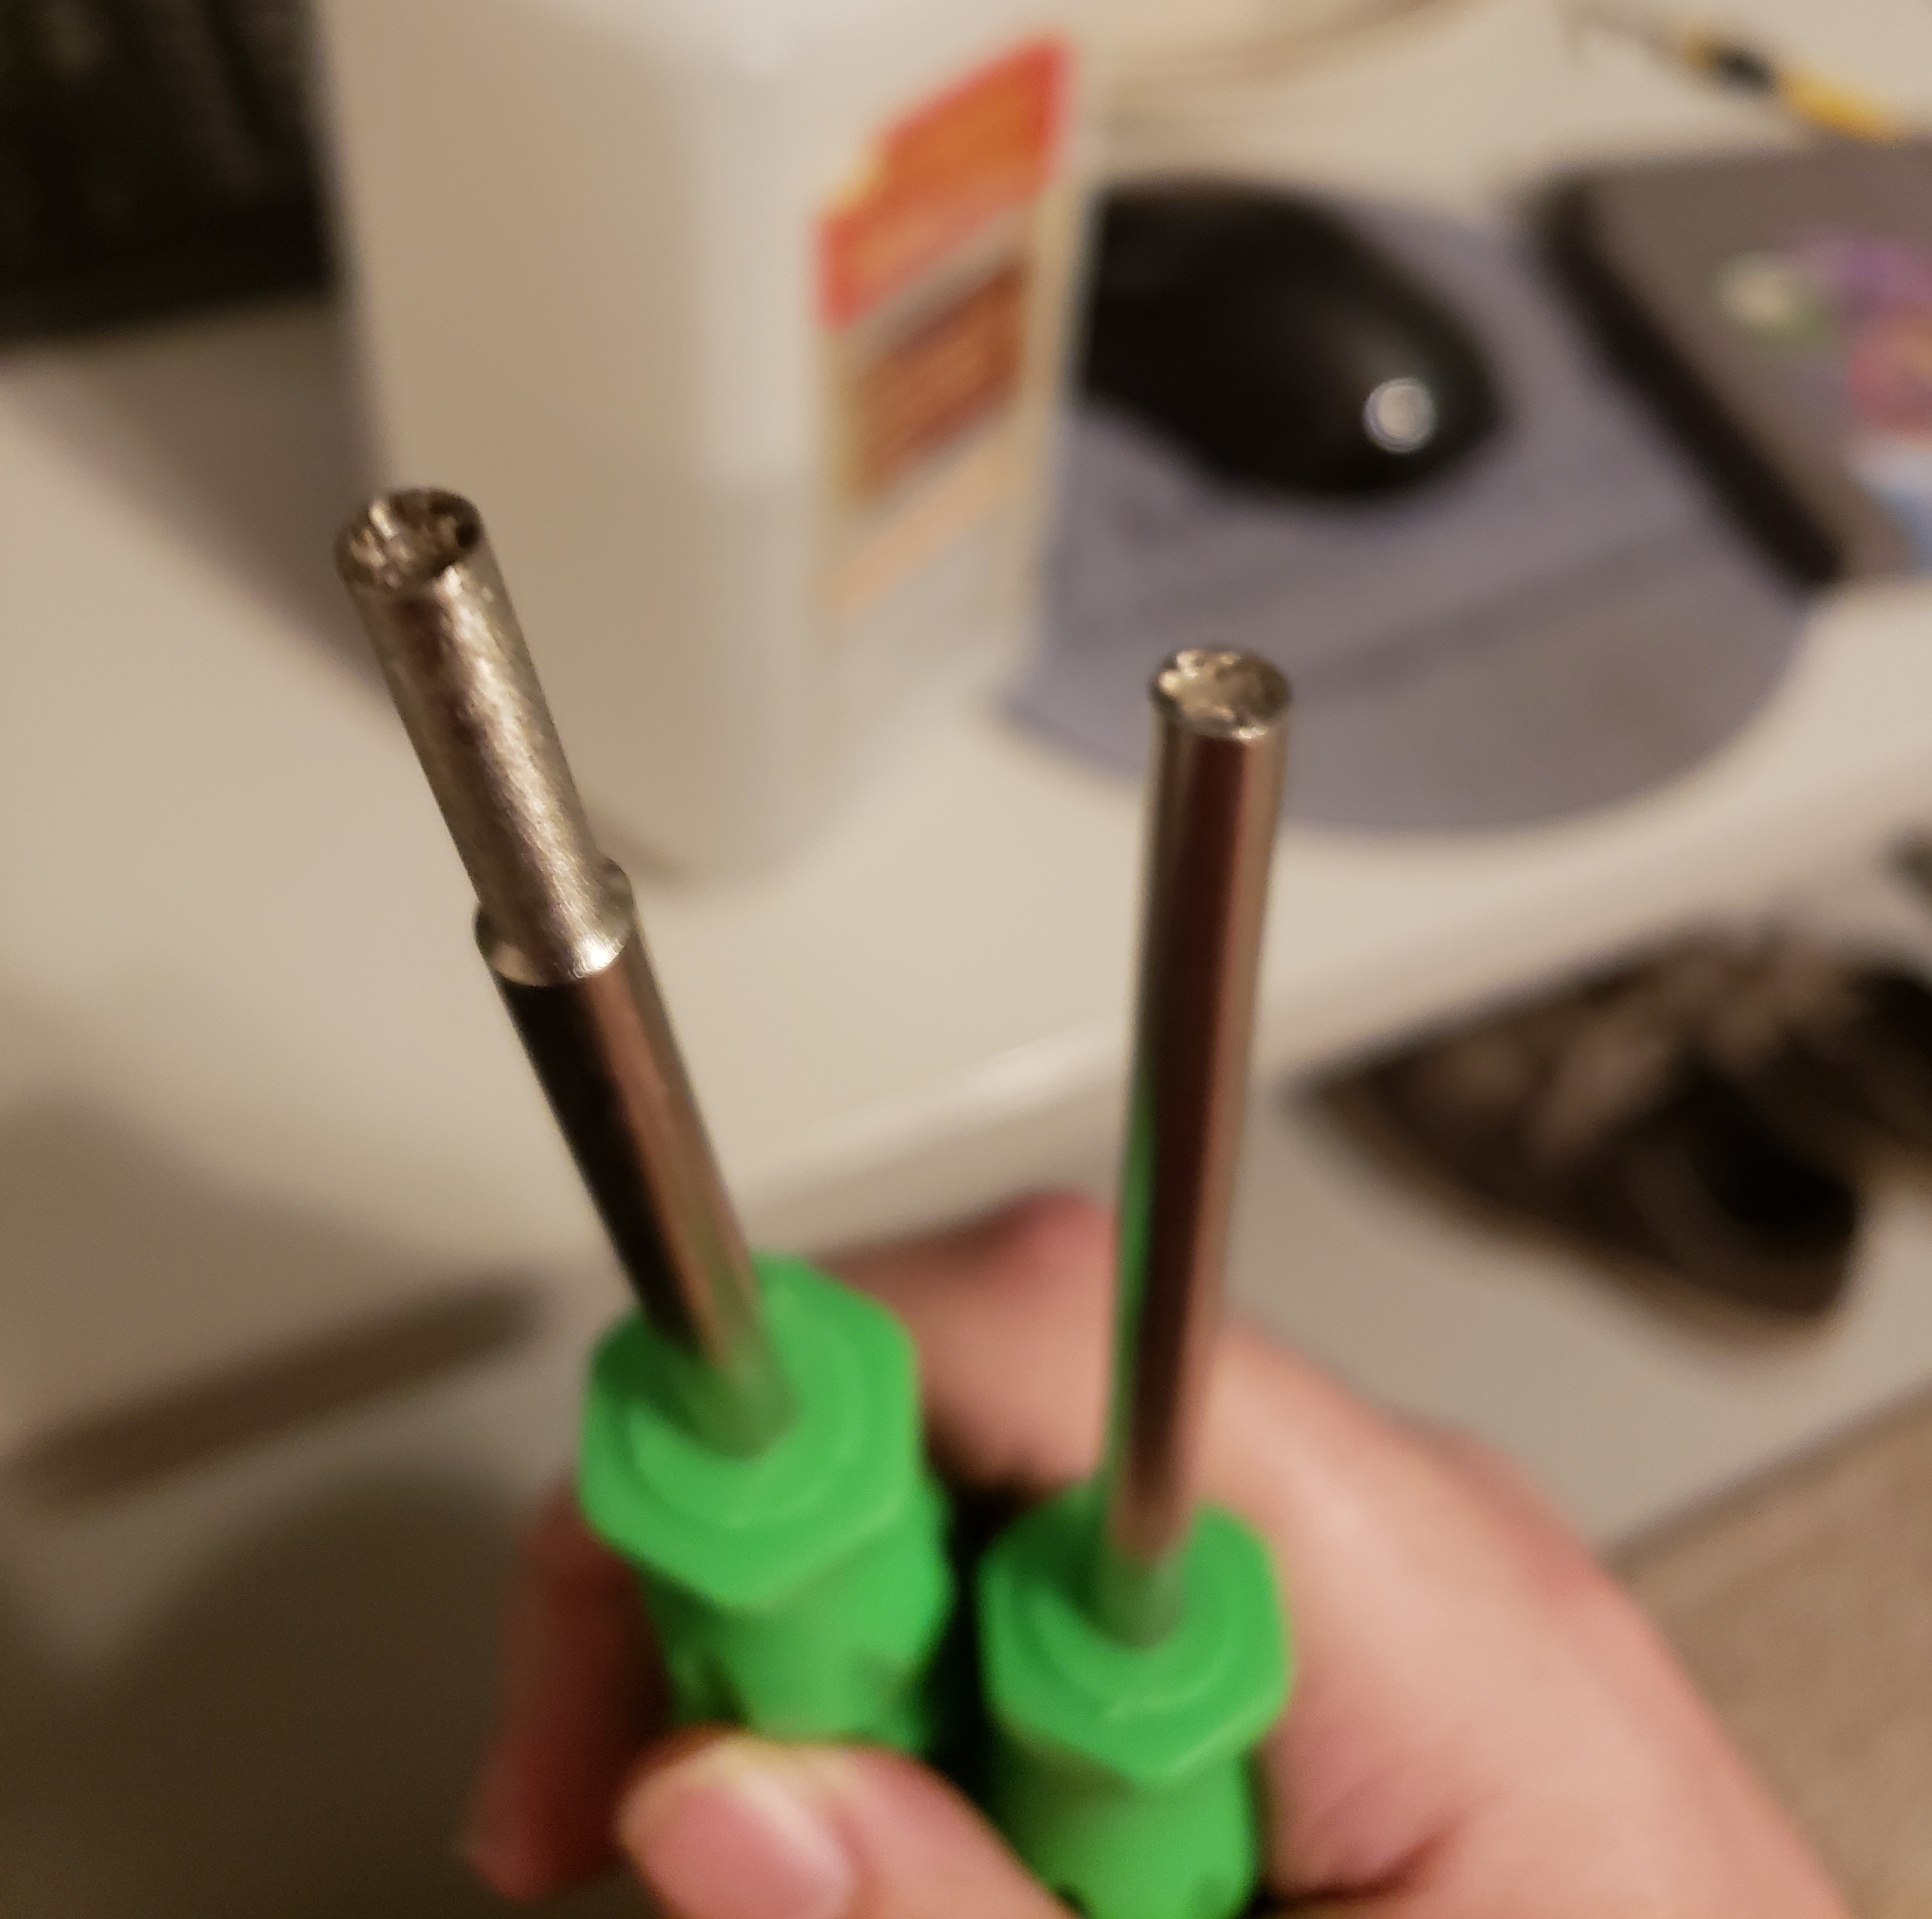
So I got the cart opened and looked inside. I did some digging around the internet to find out what each of the chips were with (hopefully) a pin diagram. From the looks of things all the traces were nice and clean, no breaks.
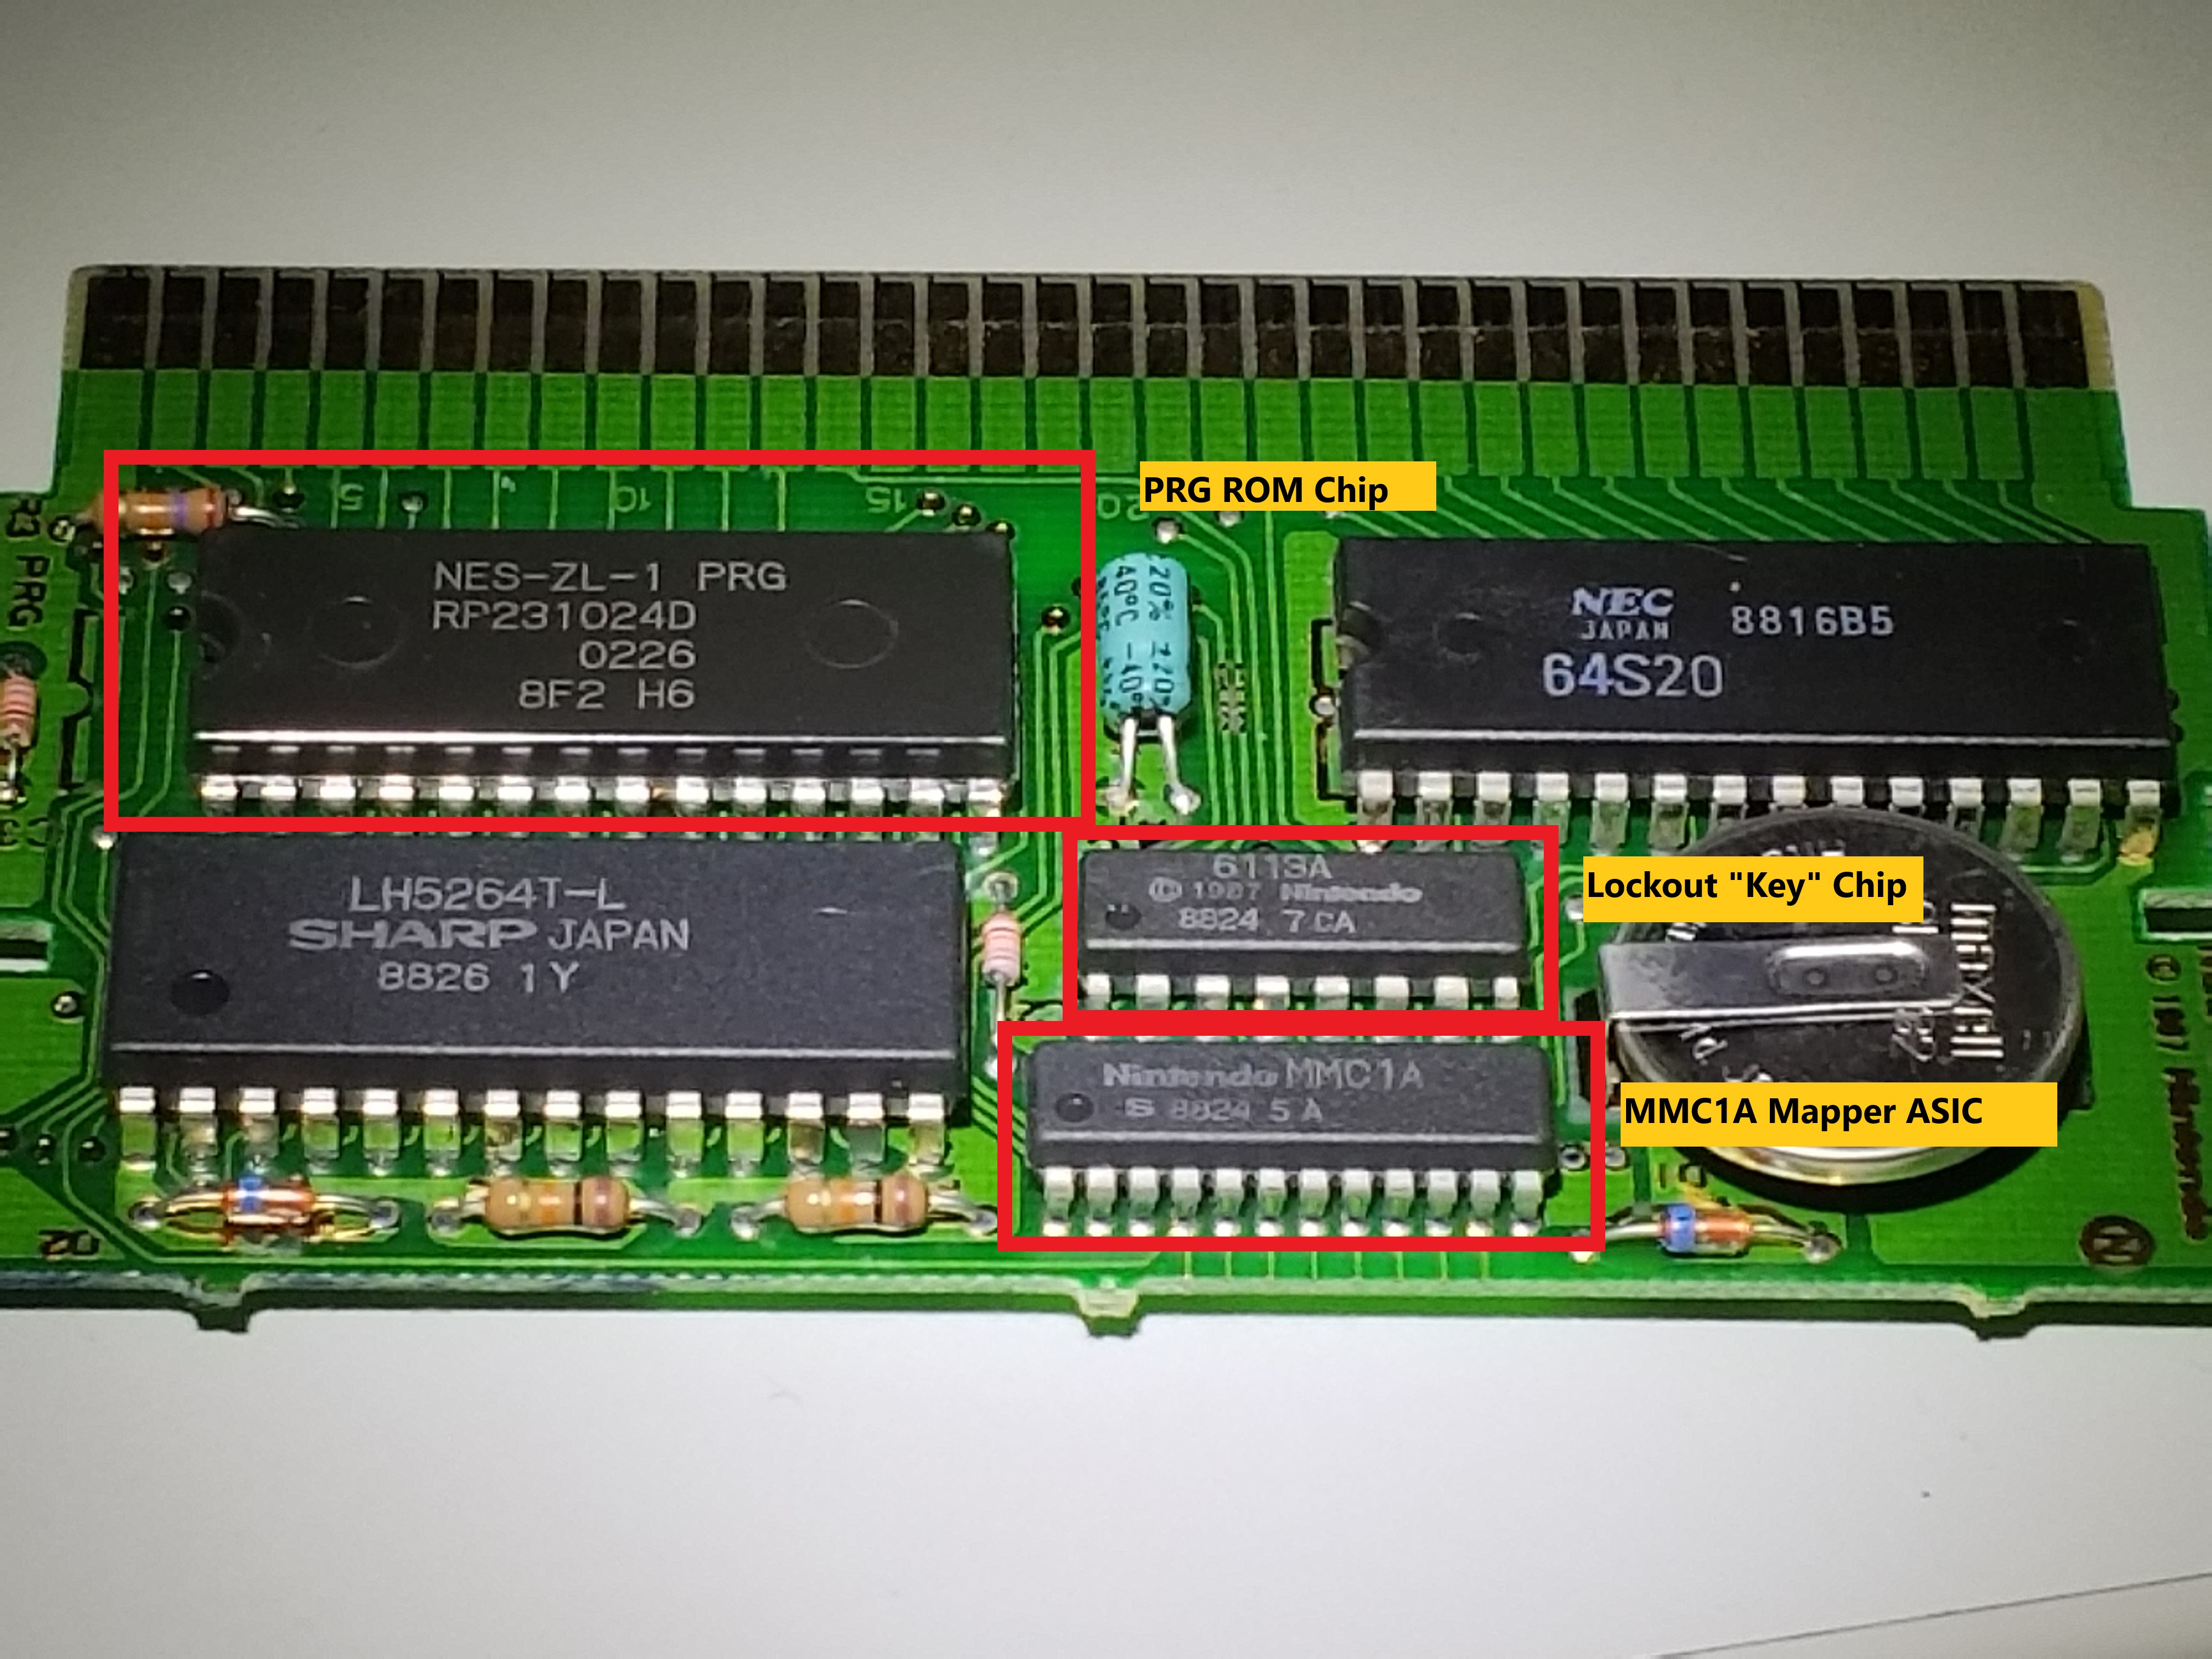
So, here’s a close-up of the game’s board. PRG ROM is connected to the CPU and holds the ‘game’ proper, so that’d be the most important part to test. Next there’s the MMC1A Mapper ASIC which was just for memory mapping tasks for the game. Something not working there would most certainly crash the game. Then there’s the ‘key’ chip, which was essentially the cart’s part of the old NES’s lockout chip handshake, essentially how the cart proved itself to be real. The last two chips I can’t really say. One of them is a 8K RAM chip to hold save games, backed up by the little watch battery you can see there. The other is a CHR ROM chip for storing graphics, meant to be hooked directly to the NES’s PPU.
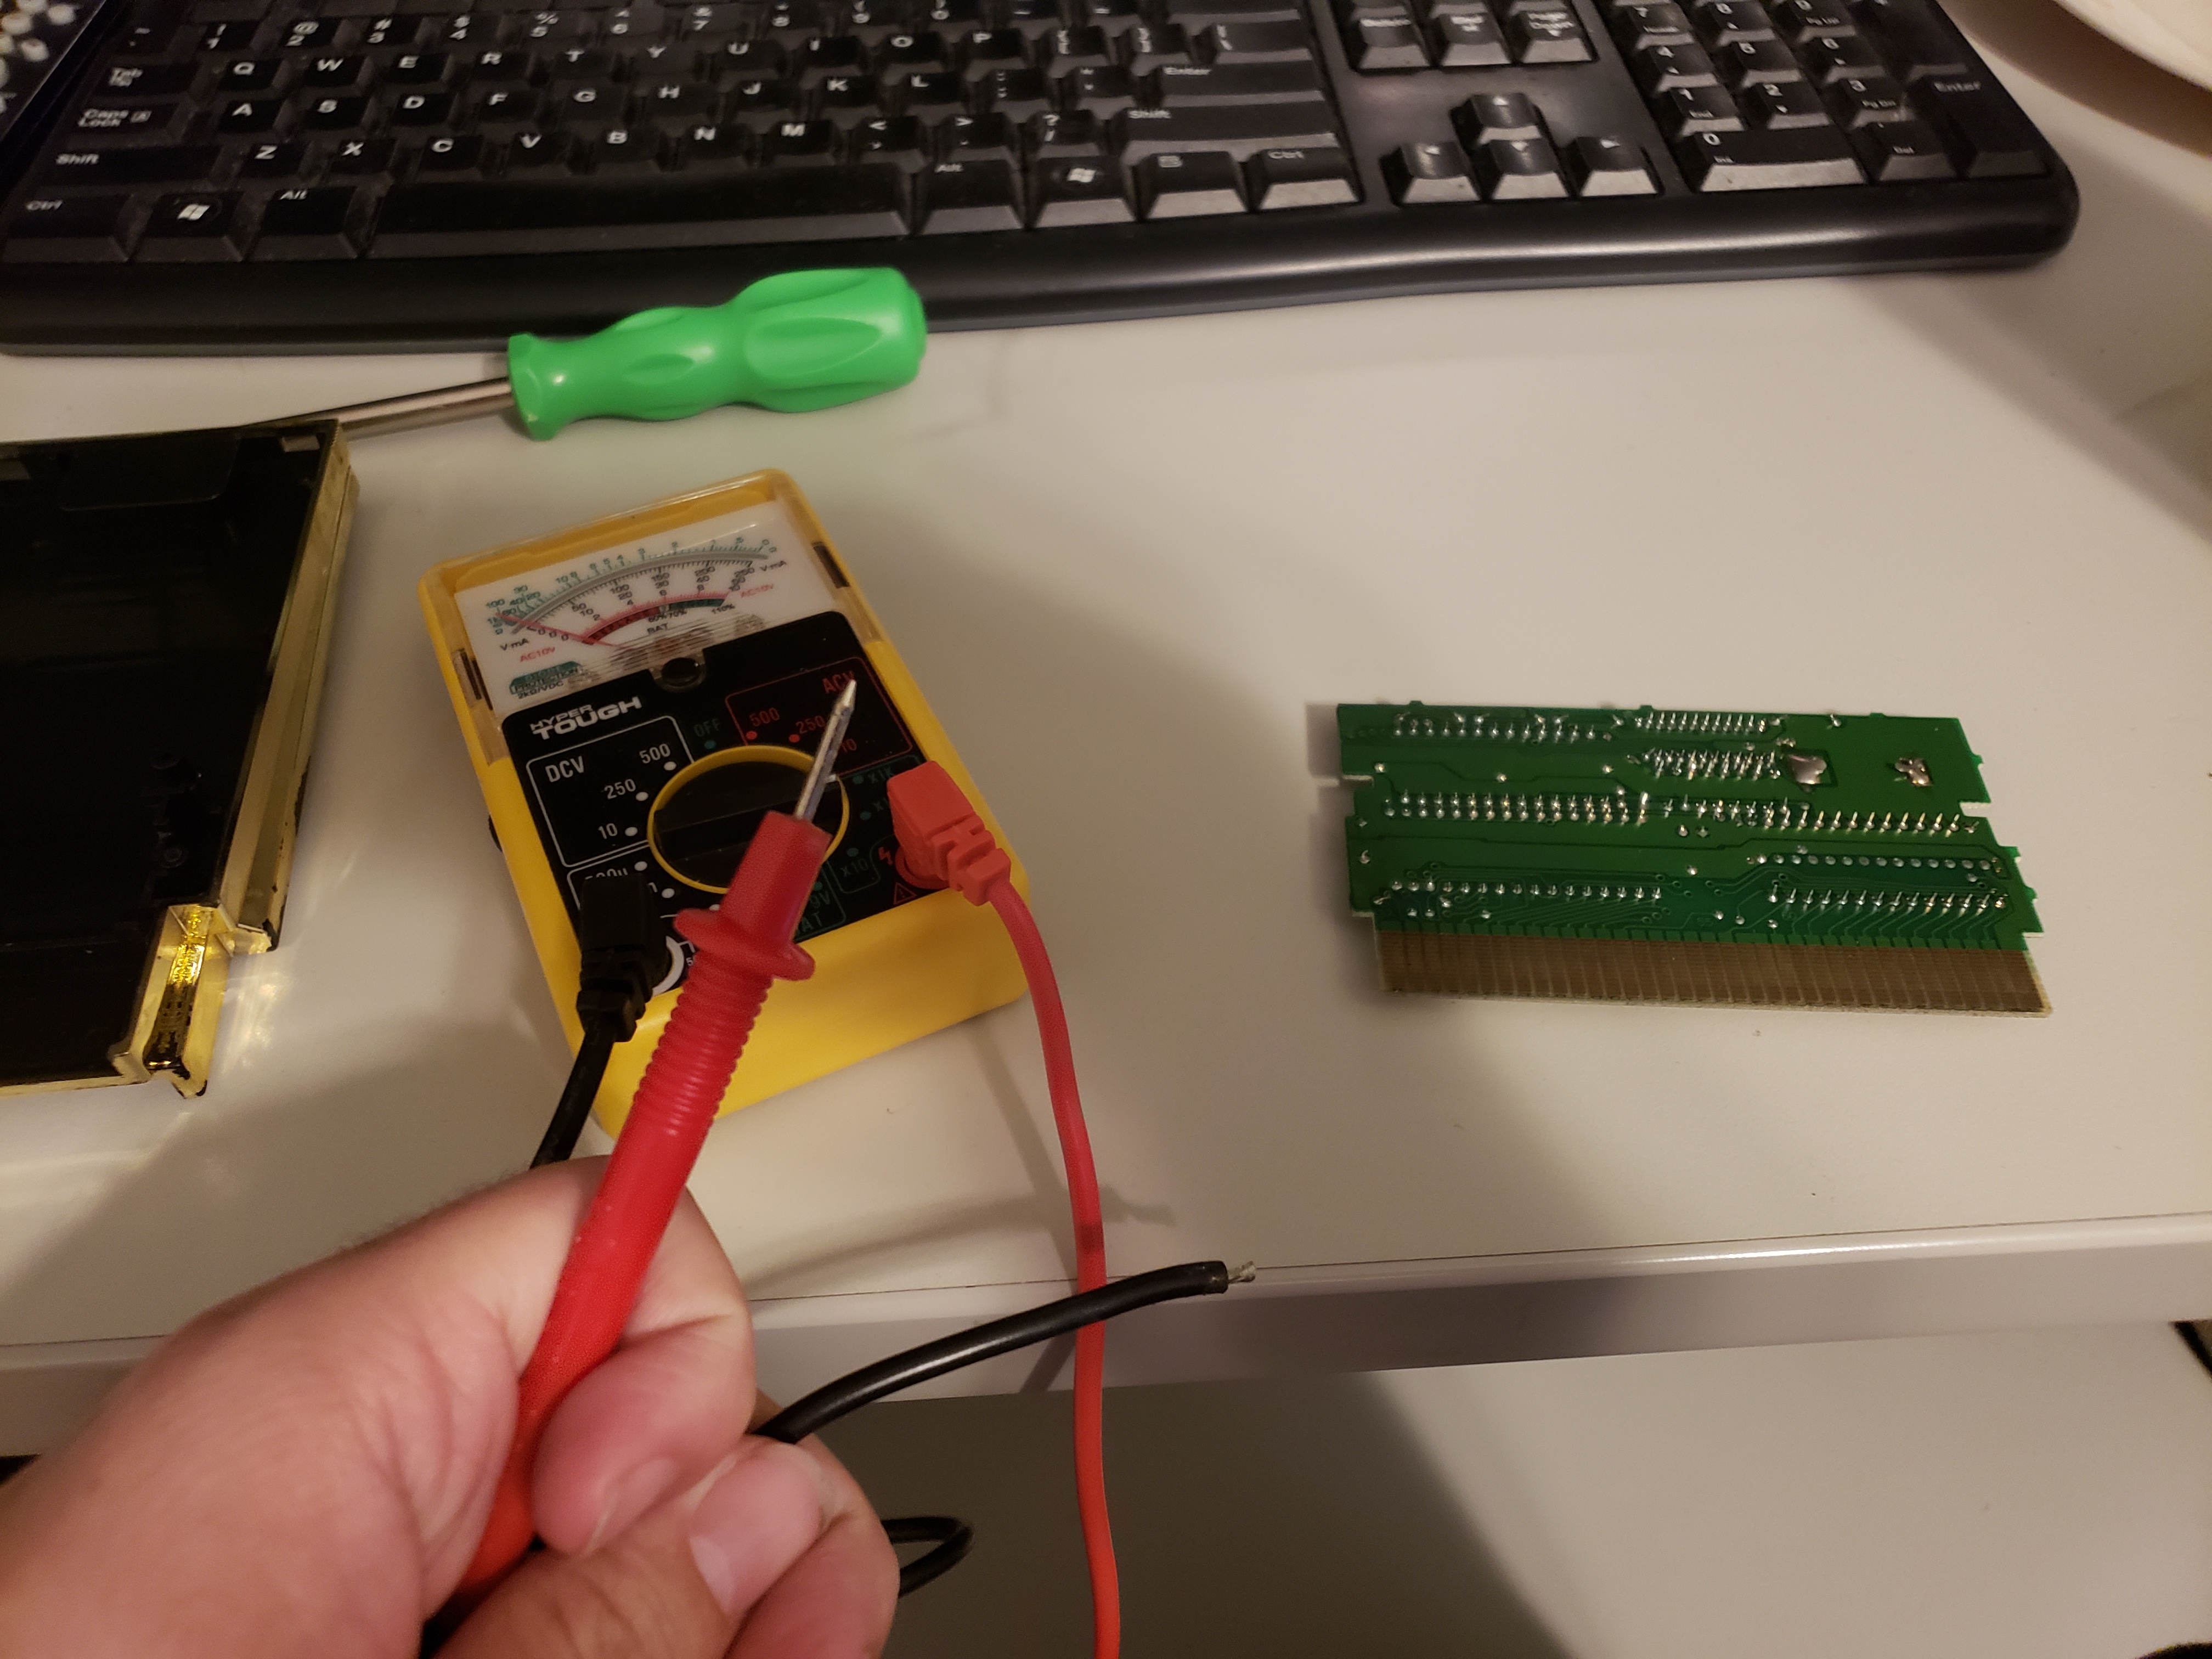
For testing, I brought out my trusty, janky, cheap Walmart multimeter for some continuity testing. I was able to snag a few diagrams from here which I have down below:


I couldn’t find a diagram for the ROM chip, but I at least knew where the main 72 pins were going, specifically which ones were tied to the PRG ROM. The testing process wasn’t exactly scientific, I was mostly looking for any glaring issues, like multiple pins that didn’t have continuity with any of the main pins. No such problem however, at least as far as I could see.
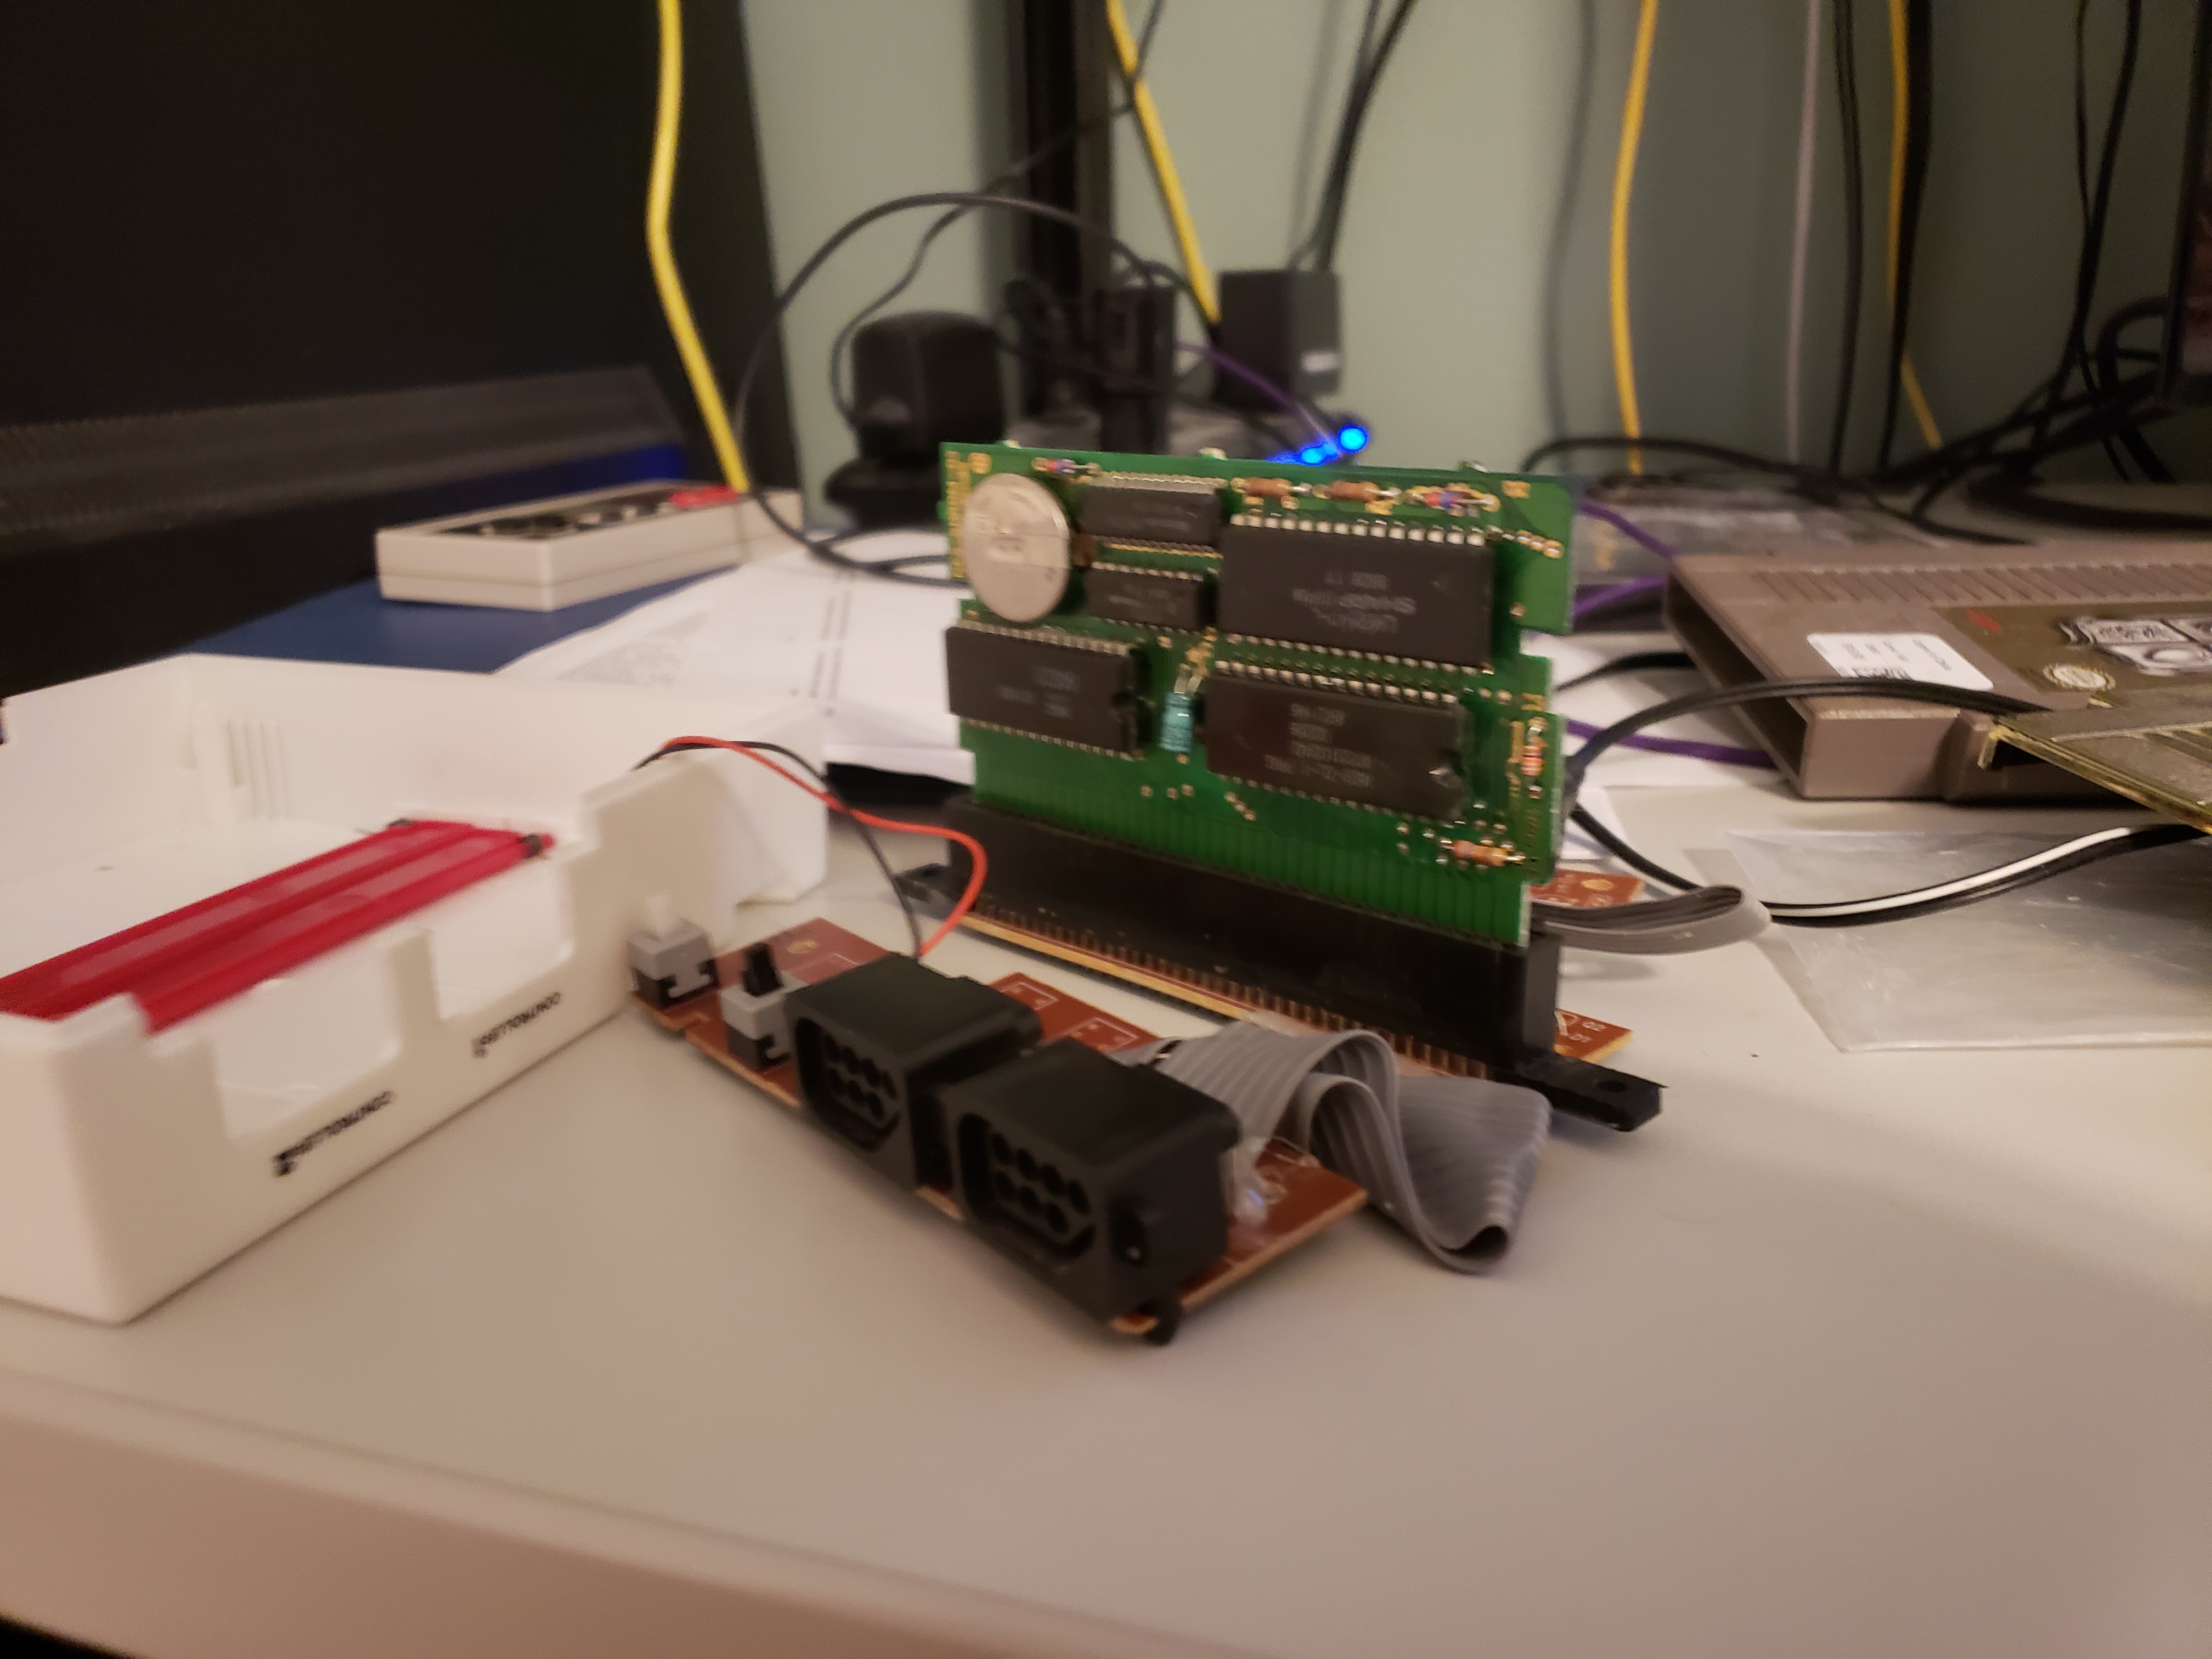
I tried once more, now with this bare-bones set up. I had a flashlight trained on the pins, making sure each and every one had good connection between system and cartridge. Even so, it still didn’t work. With the power still on, I fiddled with the cartridge a bit, when suddenly…
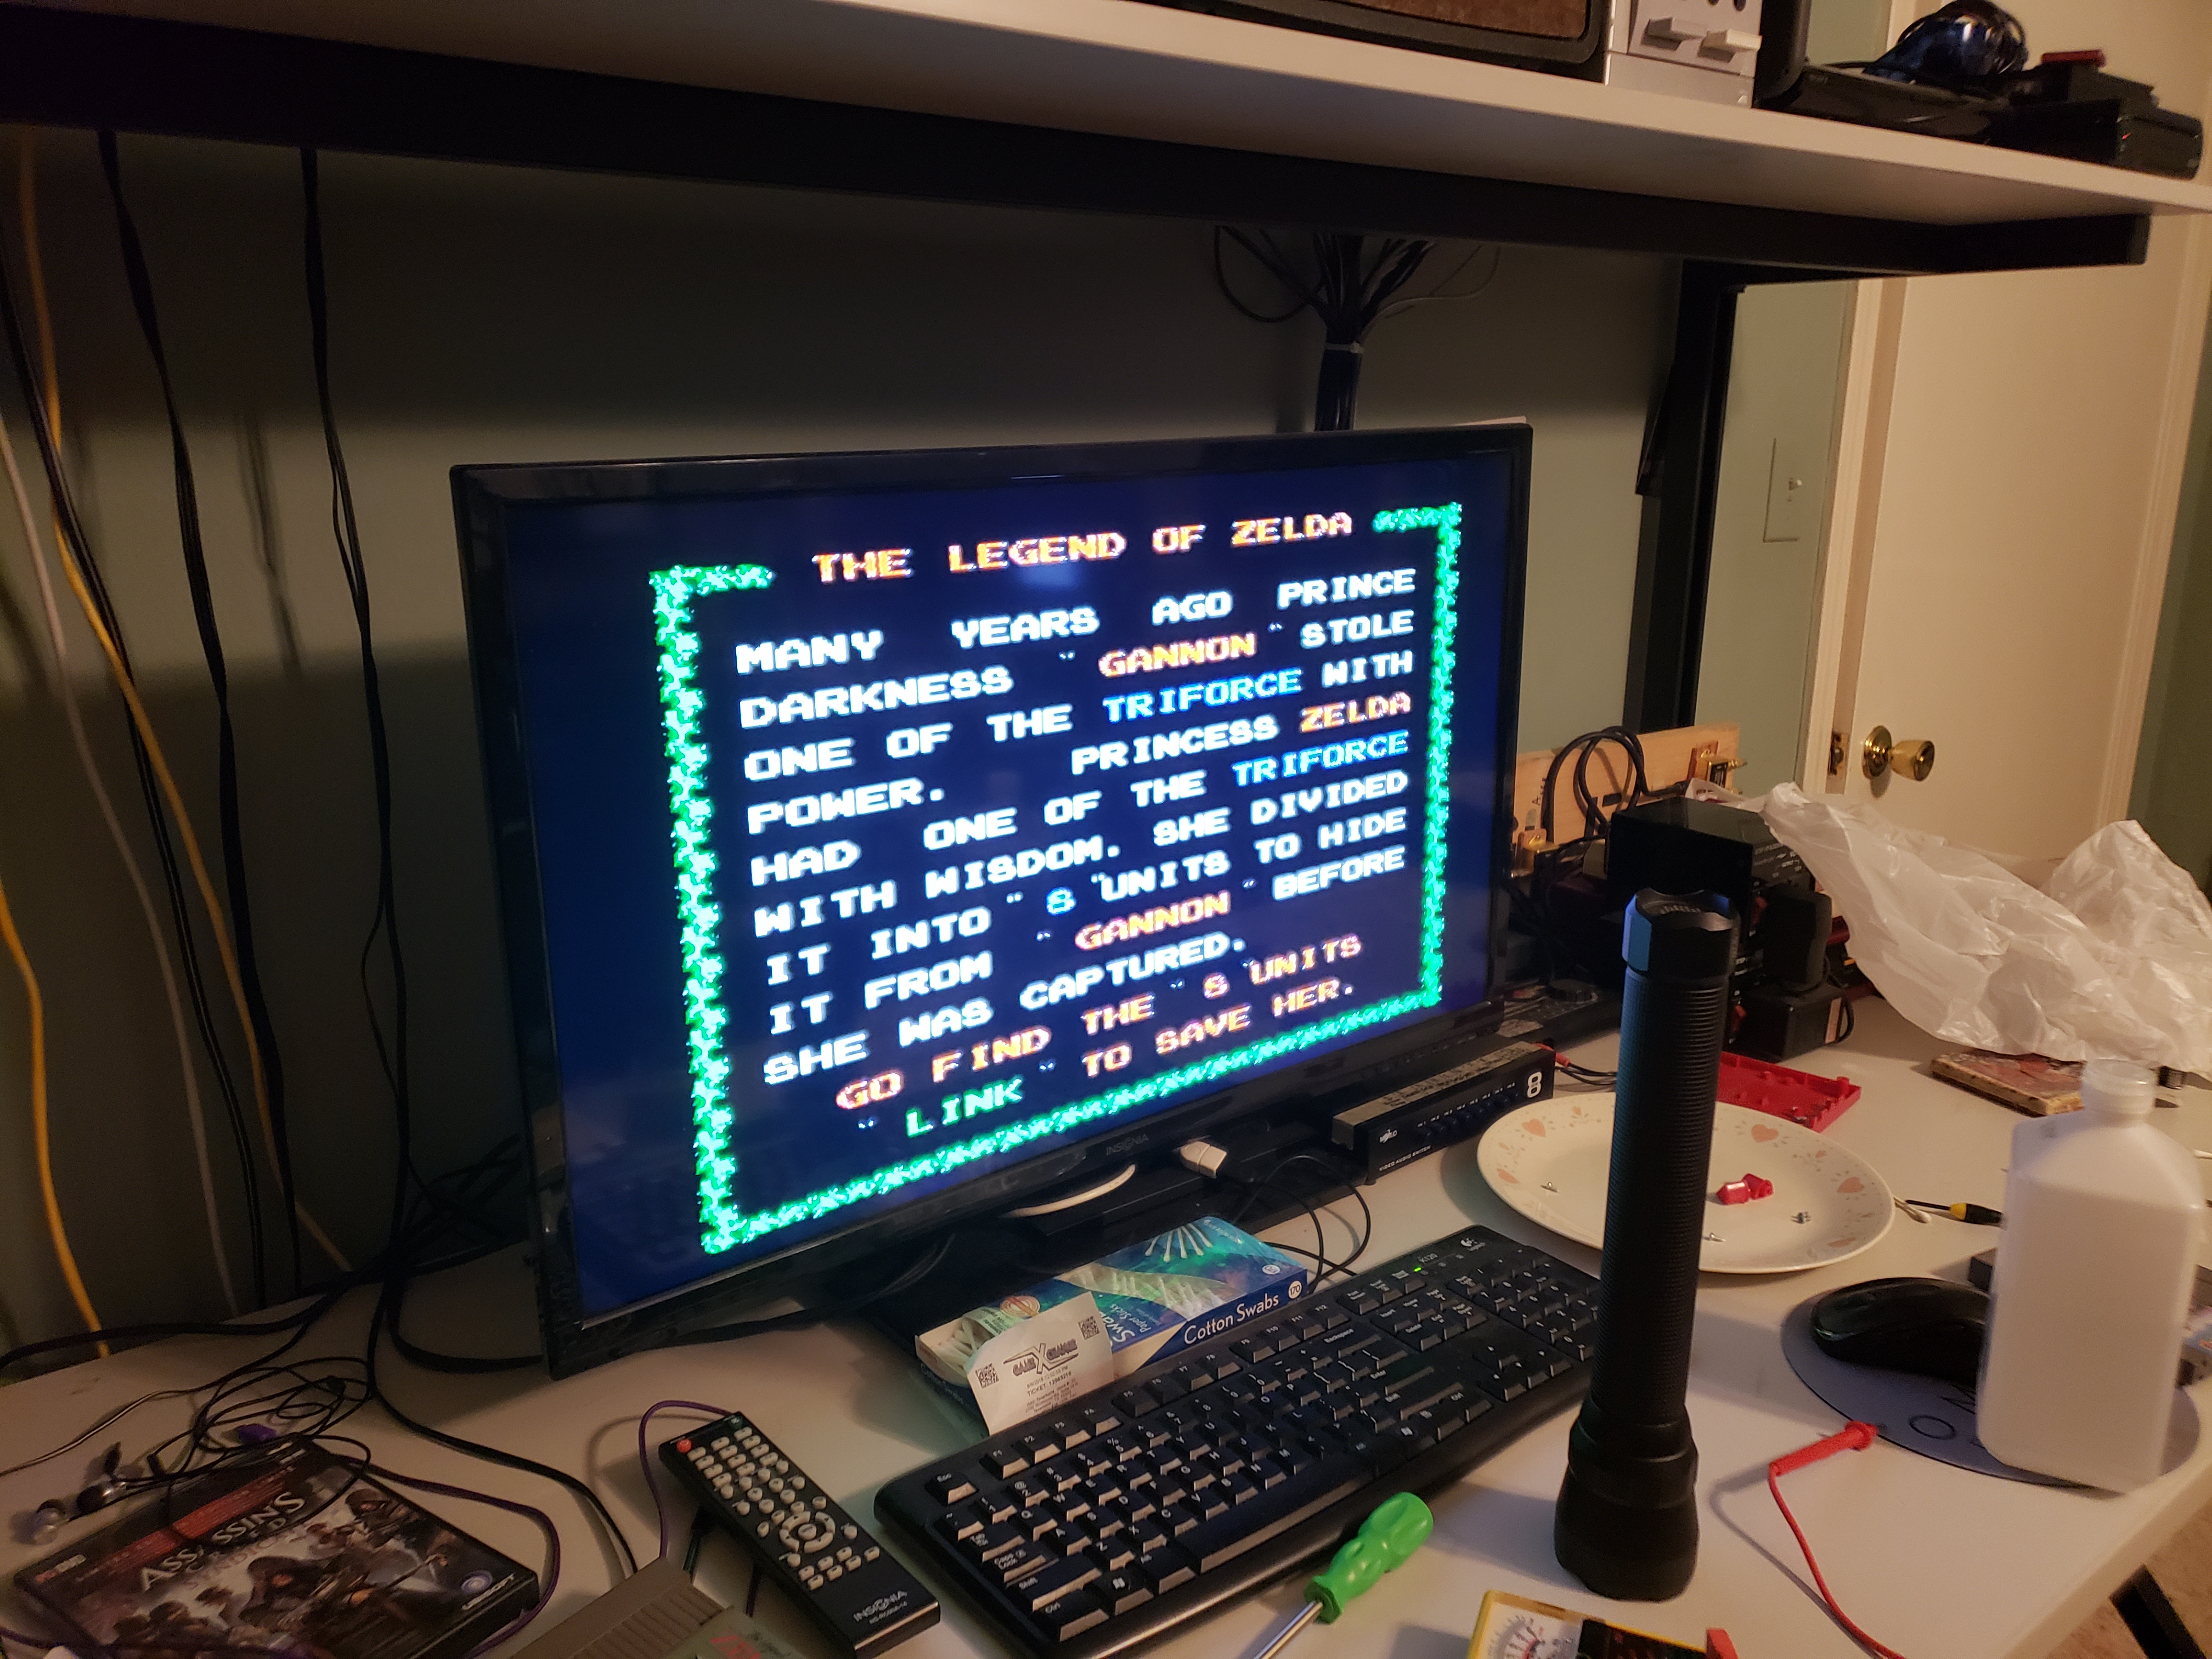
The game suddenly sprang to life. As it turns out, the cartridge just needed a good jostling. I tested with the other cart, the grey one. Insert, switch on, jostle a little, and it’d work, very repeatable. So the consistency of the solution was nice, but it makes me feel like my console is on its last legs.
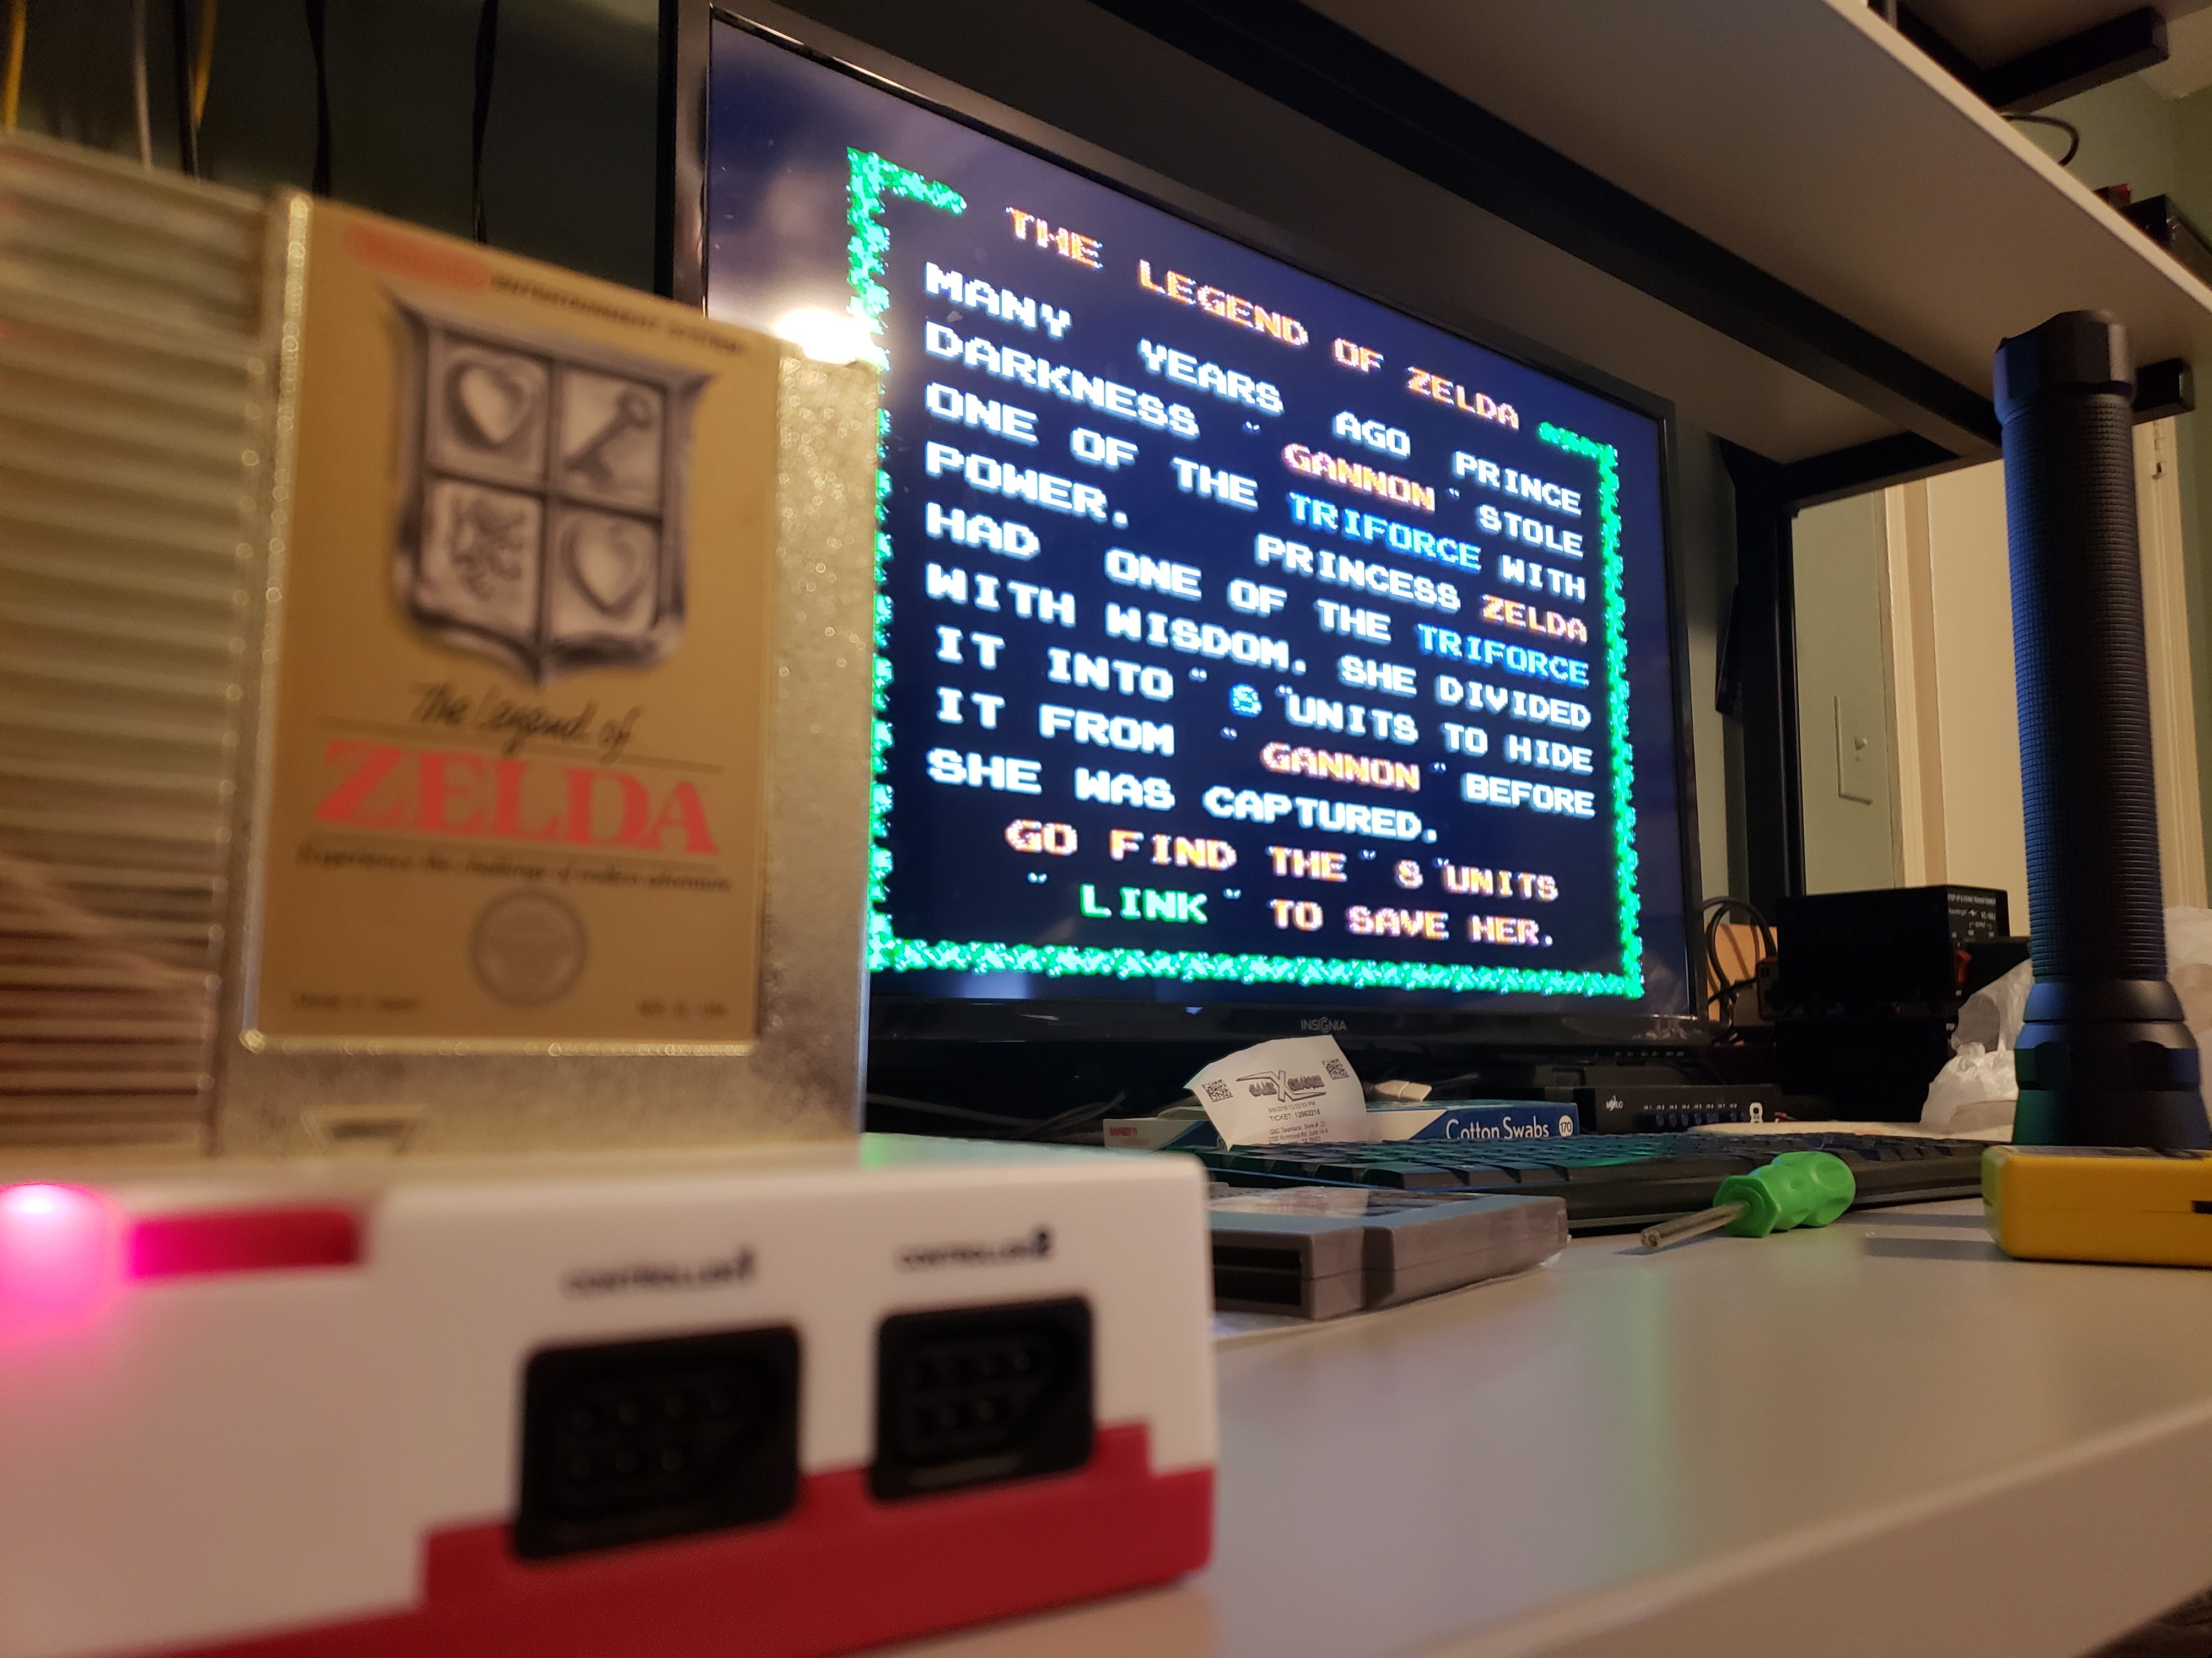
Still, it’s good some of the games that have seemingly gone bad have been giving new life now that I’ve figured out it was a problem with the system. Still, what that problem could be remains a mystery. The hardware running the game is so tiny, under that black blob of rubber that it’d be nigh impossible to properly diagnose. It’s almost like a specific pin needs to be temporarily disconnected and reconnected after power on. hence the need for jostling. Maybe the security pins, though I’d imagine for a top loader (since there’s no lockout chip), security pins would just do nothing, going to ground.
Either way, I’m happy this is at least partway solved.
~Nicko
24th August 2018 5:08 am
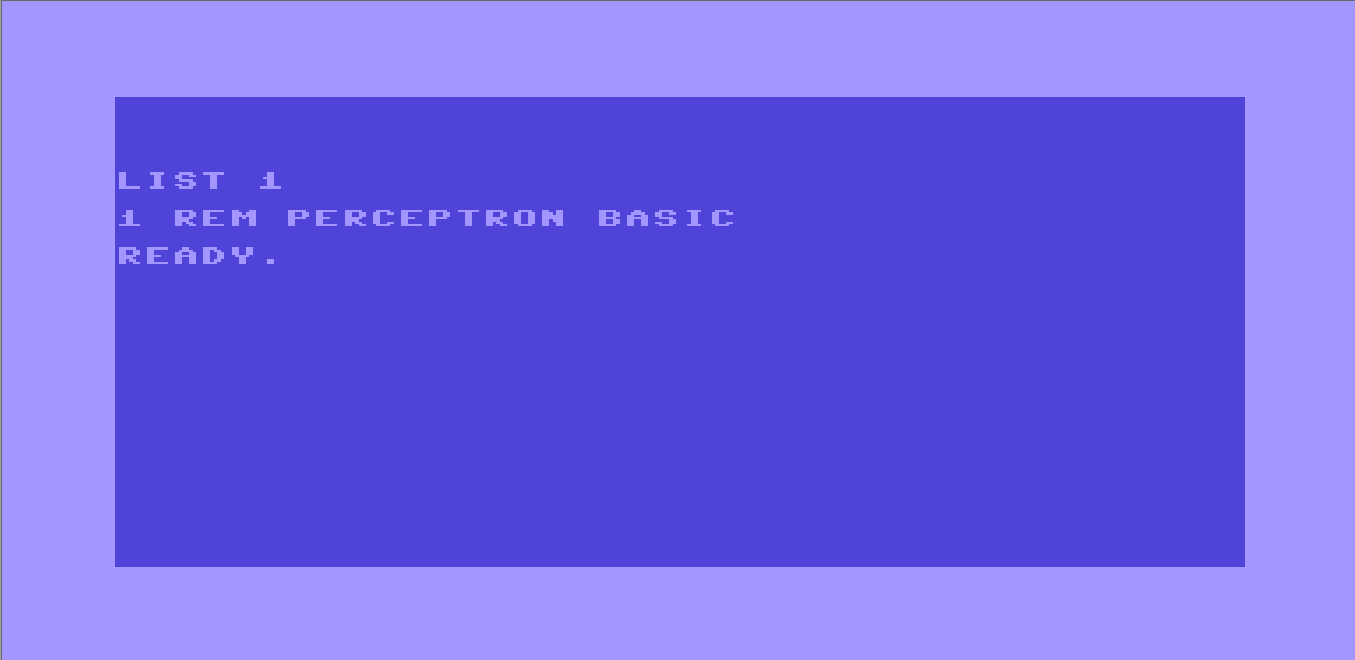
If you’ll recall my first post on this subject you’ll remember I had wanted to start with coding a perceptron into a Commodore 64 emulator. Tonight, I tried to bring my mad experiment to life.
So, because I had absolutely no faith in my skills in BASIC V2 I wrote this code and tested it piecemeal. Write a little, run a little. With that in mind, I transcribed the first bit of my notepad code to the emulator:
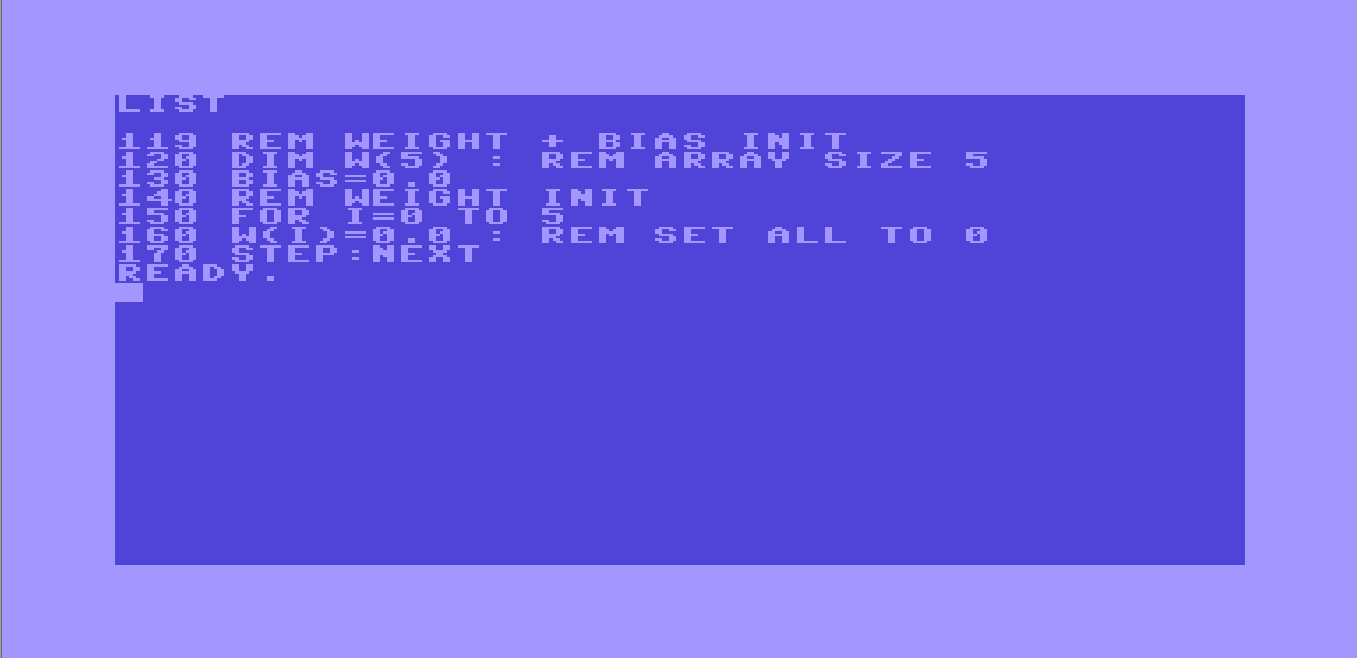
And the result?

Not exactly a huge surprise. First off, it’s not “STEP:NEXT”, it’d just be “NEXT I” to denote a new I to continue the loop. With that fix the initialization of the bias and weights was put into place, now I could get focused on the data input. For the simplicity of the program, the data is user-defined.
I have it set up such that this has 6 nodes. The input has to be written as “010101” with quotes included. The numbers can be anything, but I tested with 1s and 0s. The code’s meant to take these 6 numbers as a string then break it up later into an array of 1 character strings that can be evaluated. Thus, the input was coded (with some effort, the name of the variable had to be changed. BASIC V2 isn’t fond of fancy variable names).
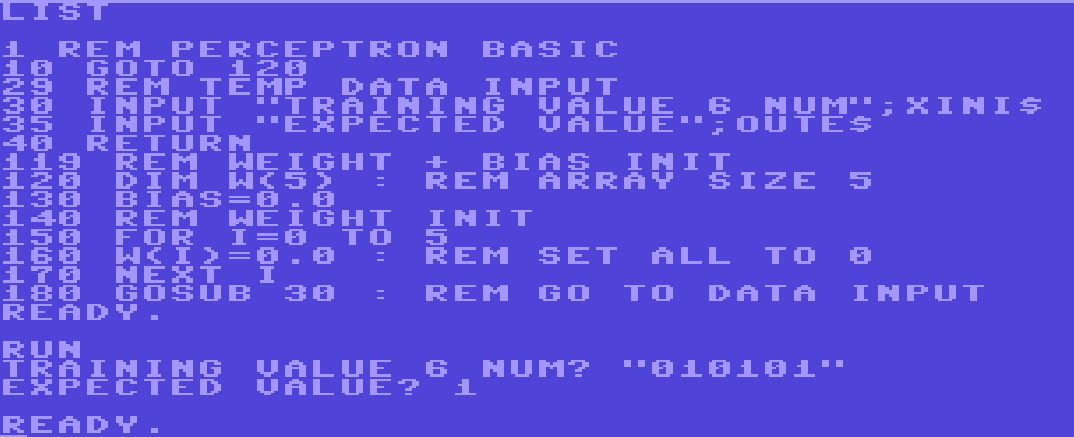
So, the input is a subroutine above the rest of the code. The idea is that I can take that block of code between 1 and 119 and make it into whatever I want later, so long as something is put in XINI$ and OUTE.
The next snag came from trying to actually break up the XINI$ string. The obvious choice was to use MID(x,y,z), which takes a string, x, and returns z characters starting at position y. So we could take our string, XINI$ as x, and iterate I from 0 to 5 to be our y, with z remaining as 1 so we can get each character one at a time. Except, woah there, cowboy. We run into another problem.

Type mismatch? What type mismatch? X$ is a string array. XINI$ is a string, so what’s the issue? Well, turns our MID(x,y,z) is for real numbers. If you want to do strings, you have to use MID$(x,y,z).

Even after figuring THAT out, there’s another issue of an illegal quantity. This isn’t an array index going out of range, that’d come up as “BAD SUBSCRIPT”, this is something different. I started a new instance of the emulator to test the DIM X(Y) command to see how it worked.

As expected, it’s 0-indexed. DIM X(50) has an index range of 0 to 50. Here you see I made an array of size 50 and show just that. X(99) and X(51) throw errors. So what’s the problem? Oh, just everyone’s favorite: Inconsistent array indexing. See, while calling a value from a DIM’d array is 0-indexed (ie X(0) is the first value), the MID(x,y,z) function decided to throw consistency to the wind and has the starting position value, y, be 1 indexed (ie MID(X,1,1) refers to the first value and MID(X,0,1) throws an error).

So, fine, have the for loop start from 1 and go to 6. Except X$, the array we’re breaking the string into, has to use I, too. So, no big deal, just do X$(I-1) instead, that’ll fix it, right? Well, yes, assuming you can find the subtraction symbol. This will probably be less of a problem on a real machine, but it can be a hassle on emulator.
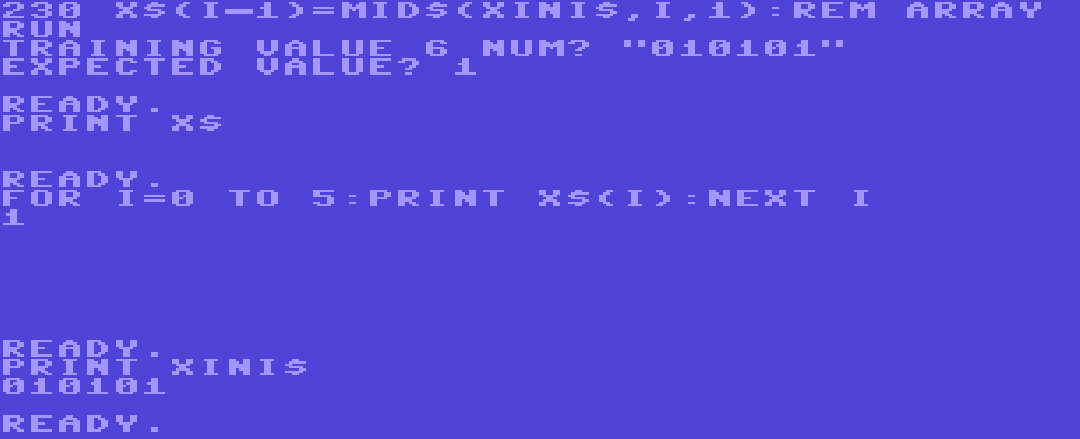
The formula above LOOKS right, but it produces incorrect output. Why? Because that’s not I-1. That’s I[Horizontal Line]1. For those not in the know, the Commodore 64 keyboard has a lot of keys and functions that don’t exist on a modern keyboard. This includes several graphical symbols that were used mostly to make graphics for games or for formatting documents. You’d draw out borders using line characters. Thing is, these line characters can look awfully similar to minus symbols if you’re not careful.
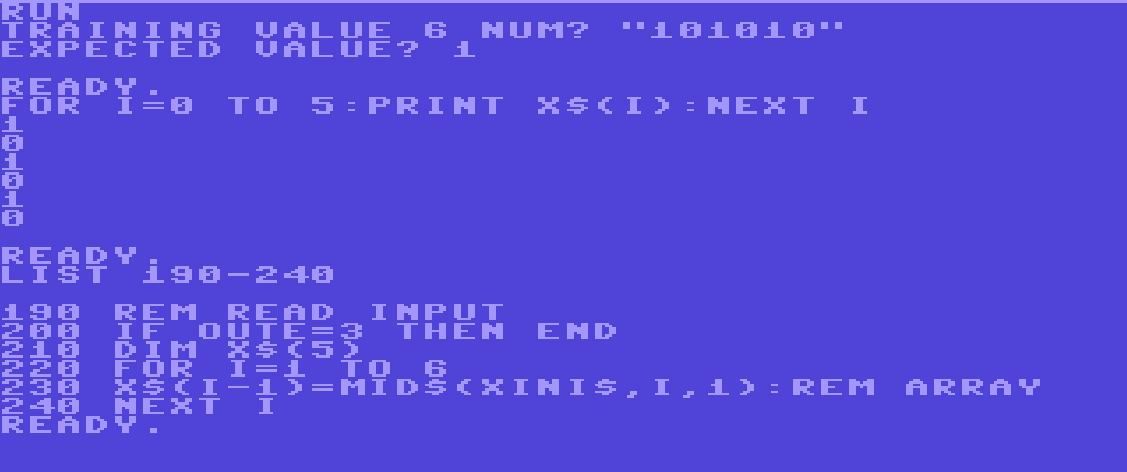
So finally we have our input broken down and we can move on. Next, we focus on the code that actually calculates the system’s answer given an input. Reading off of its weights and biases:

Which results in…

Once again I’m getting too fancy with these variable names. X, Y and Z variables never killed anyone, I suppose. The lack of room for comments makes it even worse, this’ll be hard to understand in the future. Total is now Y. I go ahead and change ‘ANSWER’ to Z.

Finally, we can zip through the code for updating the biases. Following the Perceptron algorithm, it only updates the weights if the answer was wrong. IE if OUTE != Z. Granted, the weights might be updated even if the system got the problem right if OUTE = 2 (which means we’re testing). This can be fixed in future.
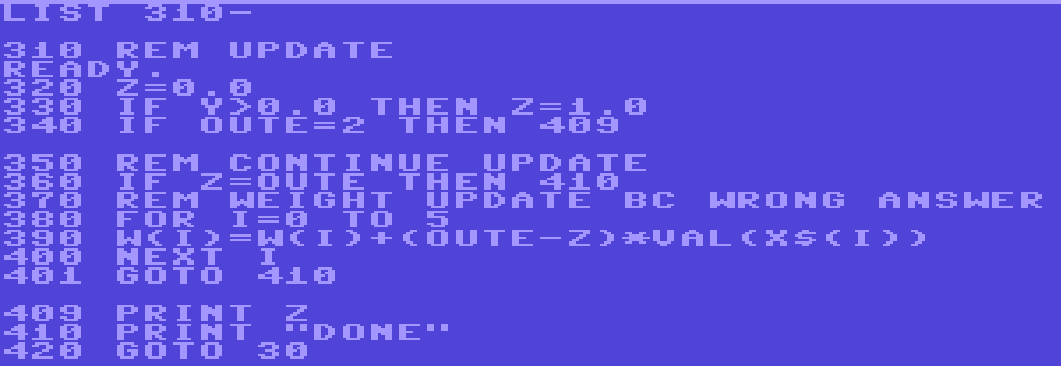
Running this, everything seems to be working fine until we attempt another pass of data, where we run into this:

Right, I had read this, a DIM’d array can’t be re-DIM’d. So, who says we can’t just DIM X$ once at the top of the code? Every pass-through it gets completely overwritten anyway. With that last touch, the program runs in full:
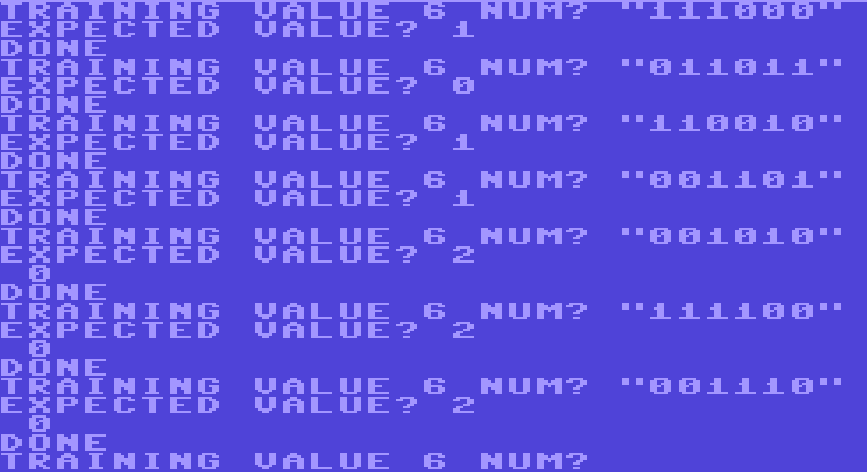
Is it really learning? It’s hard to say. It got its training examples 2/3, though it could just be outputting 0 every time. Print statements are kind of a pain on these old systems, which I’m sure is easy to see. Next time we’ll dig deeper into this thing and see what we can improve. Namely, we’ll try to add some metric in order to keep track of how well our C64 Perceptron is doing as more data is added. In addition, a new Data entry method is required. We’ll also need PRINT statements to see if there’s any errors under the hood.
I’ll be throwing up my CCS64 Savestate onto github along with my BASIC code in a txt document into a repository on GitHub.
~Nicko
23rd August 2018 3:06 am

On my github I’ve started sporadically doing programming challenges in my spare time. Since Python is the easiest language for me to put down and pick back up I’ve opted for doing these in that language, though I might see about returning to some of these in other languages.
These programming challenges come from a phone app linked up to r/dailyprogrammer. Today I’m looking at a Beginner Challenge, Knuth’s Arrow, just for simplicity.
(BEGINNER) Knuth’s Arrow:
For a lot of these programming challenges the hardest part is often trying to figure out just what the concept behind the challenge is. From Wikipedia:
In mathematics, Knuth’s up-arrow notation is a method of notation for very large integers, introduced by Donald Knuth in 1976.
Essentially, Knuth arrow is iterated exponentiation, the same way exponentiation is basically just iterated multiplication and multiplication is iterated addition. So one 2↑2 is the same as 2^2, since there’s only one arrow.
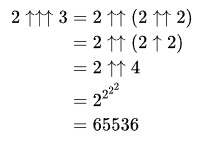
Thankfully, the reason this problem is ‘beginner’ is because Knuth Arrow follows a pretty simple formula that just needs to be replicated in code:

So, this is exactly as Wikipedia says:
“…more than one arrow means iterating the operation associated with one less arrow.”
Right away this can be seen as a recursion problem. It’s just compounding knuth arrow formulas on top of one another until you reach one of two terminating cases. Thus, the program is fairly short:
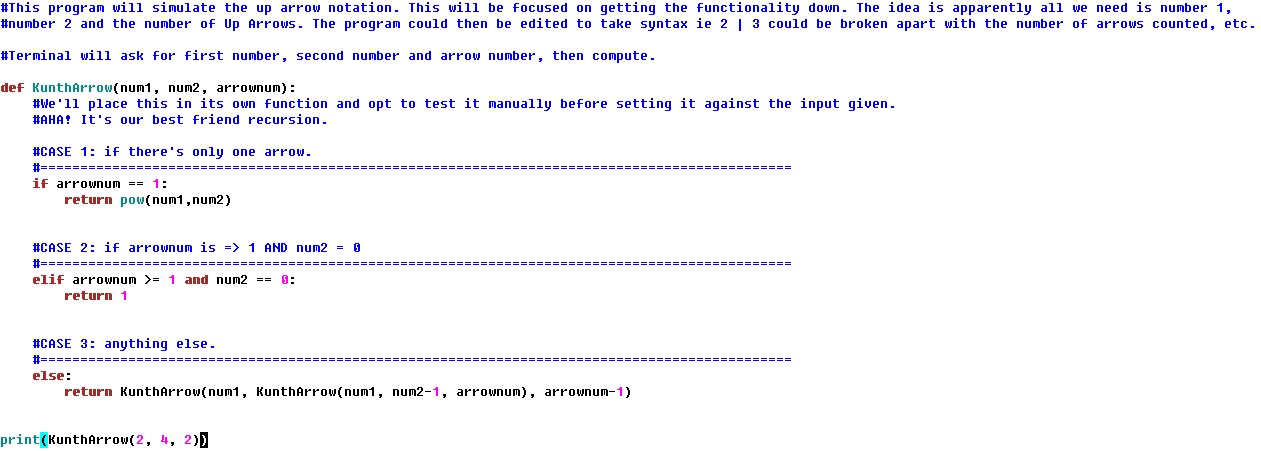
For the sake of simplicity, it just runs with test values. Here shown it’s given test values 2↑↑4. This is expected to produce 2↑(2↑(2↑2)) or 65536. Checking our output we see that the program outputs exactly that:
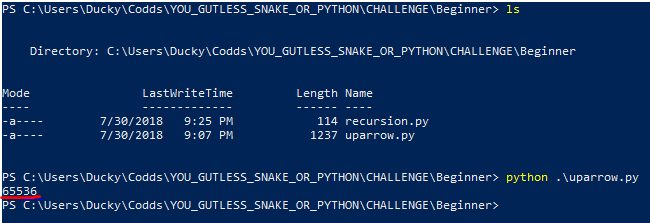
Some of the challenge input include 5↑↑↑↑5 and 7↑↑↑↑↑3. This is an excellent way to test the output. Problem is, when I ran with these inputs (ie 5,5,4) the program would seemingly hang. A couple of print statements showed the problem. Or rather the lack of a problem. When they say the Knuth arrow is used to denote massive numbers they’re not kidding. 5↑↑↑↑5 has intermediate numbers that fill up multiple screens with digits you have to scroll through. It’s likely integers on my computer aren’t equipped to simply print out numbers from a Knuth arrow. Thus, later I’ll need to do a rewrite that simple strings a string for the full knuth arrow equation with no computation.
Right now on my programming challenges Repo I have unfinished code for creating Ducci sequences, so finishing that up will be my next goal when I can find the time.
~Nicko
22nd August 2018 3:27 am
From Wikipedia:
Occam’s razor is the problem-solving principle that the simplest solution tends to be the right one.
My PC has a dualboot with 2 Operating Systems, Linux Mint and Windows 10. These two love to bicker and fight when it comes to booting the PC, such as Safe Boot in the BIOS favoring the Windows bootloader over GRUB or otherwise trying to override a Linux liveboot. Even so, I still keep it this way. Linux is for work, professional and personal, and Windows is for play (and any work that can’t be done on Linux).
So the input of the commodore 64 perceptron was put off today for a little computer fixing time, these OSes at each other’s throats again. A few days ago a brown-out occured in the house, shutting off my PC. The thing is a monster that I built myself, but its software can sometimes be a jenga tower ready to topple over.
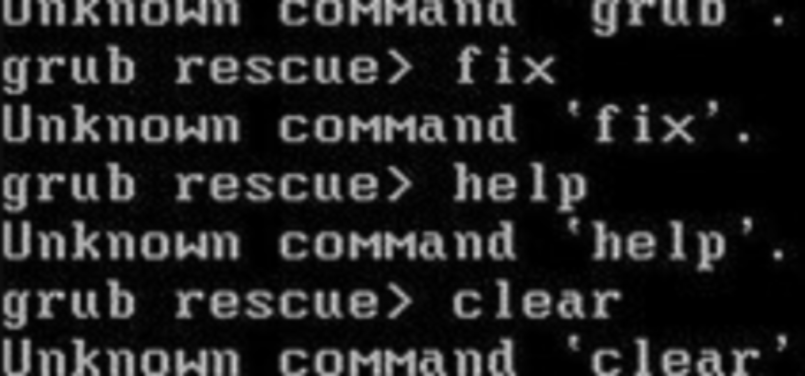
When I turned my PC back on I found GRUB in shambles. That is to say it couldn’t find, well, itself. So instead of giving me a handy list of loaders to choose from it just went straight to GRUB Rescue, a black screen/white text shell some people have the gall to call ‘powerful’. No, the rescue terminal is no BASH, not by a long shot.
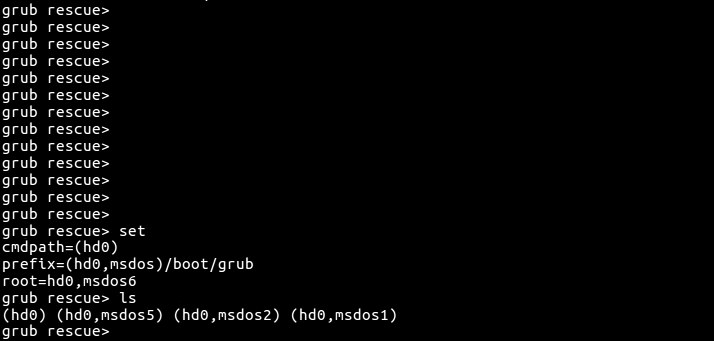
This wasn’t the first time I’ve seen this screen. When I first built my PC this happened when I tried to load into the old Mint 17 I already had installed on my C Drive. I had to manually start up the GRUB menu from the rescue terminal in order to get into Linux to make sure everything was in order. Unfortunately, this time it wasn’t so simple.
Trying to do what I did before I hit hurdle after hurdle. First, all my drives were unknown filesystems, meaning I had to comb through the lot of the drives to find the one where my Linux was hiding. From there I had to set up the root and tell GRUB where normal.mod was. Except it kept trying to look for normal in /boot/grub/i386/.
This was confusing consider I had a 64 bit machine, x86, not a 32 bit one. In fact, I could even ls my way into /boot/grub/ to find normal.mod hiding in a folder called /x86_64-efi/. So the file was there but grub was, for some reason, looking in the wrong spot.
Combing through the internet, I began a tangled web of trying to fix this issue. I created a liveUSB of Linux Mint so I could use the terminal to reinstall grub but I needed to mount my C drive to the /mnt/ folder in root but it’d claim to not be able to find a file at a specific location despite the fact I had a file explorer open and I was staring right at the file it said it couldn’t find right where it said it couldn’t find it.
In my mad scramble for a solution to this increasingly maddening problem, I stumbled across a very short post in response to someone else tangled in the web of chaos that was GRUB messing up:
Easier just to use Boot-Repair. Boot Repair -Also handles LVM, GPT, separate /boot and UEFI dual boot.: https://help.ubuntu.com/community/Boot-Repair
As it turns out, a tool called Boot Repair existed. You could load up the iso into a USB stick like a Linux liveboot, and it even had a cute little mini-desktop where you could check your drives before running a two-click wizard that instantly fixed it.
I rebooted and everything worked. GRUB menu worked just fine, both OSes boot a-okay.
Terminals and file crawling and errors that make no sense while combing through forum post after forum post…
versus a USBstick and two clicks.
Occam’s Razor holds true, as it turns out. It’s just a shame it also makes me feel like a proper idiot.
~Nicko


